Motion Blur
The following is an example of a typical workflow for enabling motion blur in RPR Plug-in for Houdini:
Launch Houdini and save new
.hipfile in the current directory.Add the Sublayer node.
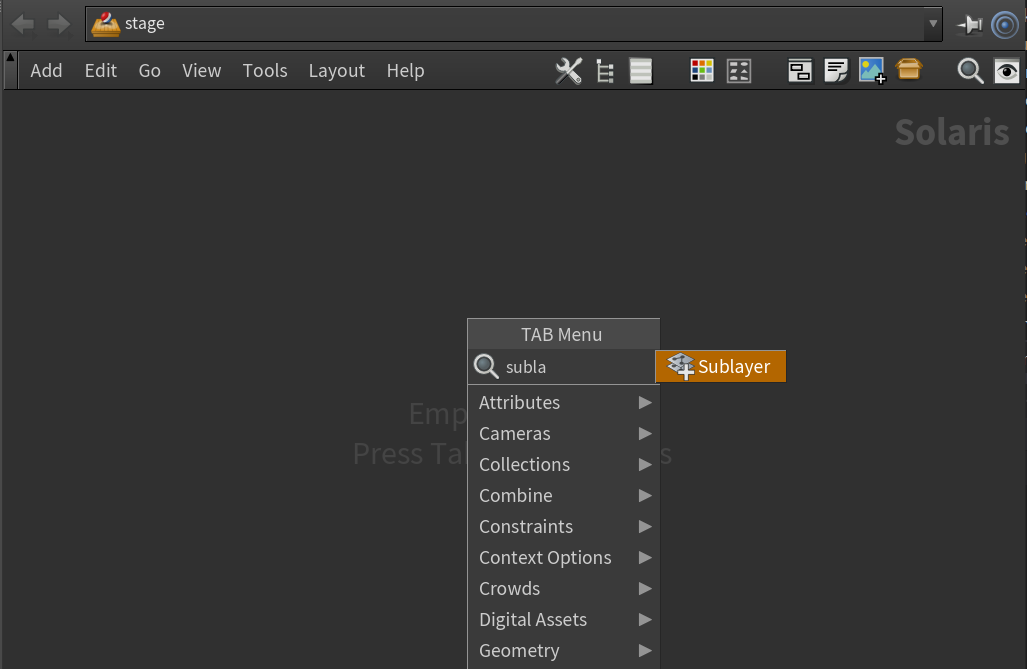
Set the sublayer path to
$HIP/../../../asset/basicScene/generated/scene.usda.
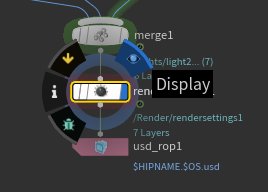
Add the Xform node and turn on Display in the node.
Set the Xform’s Primitive path to
/shaderBall1.Set the Keyframe on Translate.z.
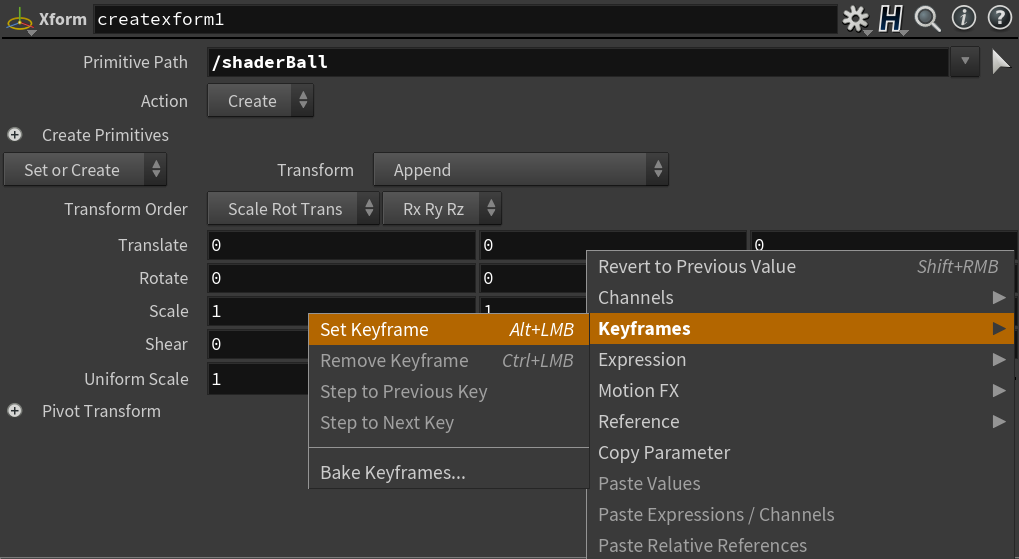
Set End Frame and Global Animation End Frame to 5.

Set Current Frame to 5.
Set Translate.z to 1.
Add KeyFrame.
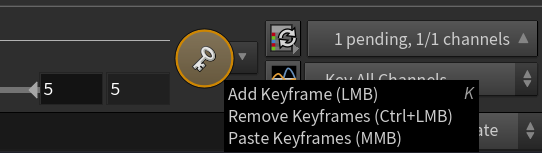
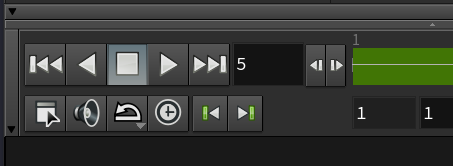
Move the frame slider and make sure that translation is animated accross frames.
Note
Motion blur is broken in Houdini’s Viewport starting from Houdini build 18.0.416. So you can either use Houdini build 18.0.391 and the Cache node or export the stage and render it with husk. We will be continuing using the second way.
Add the USD ROP node and save the stage to the disk to
$HIP/test.usda. Make sure you’ve set Valid Frame Range to Render Specific Frame Range.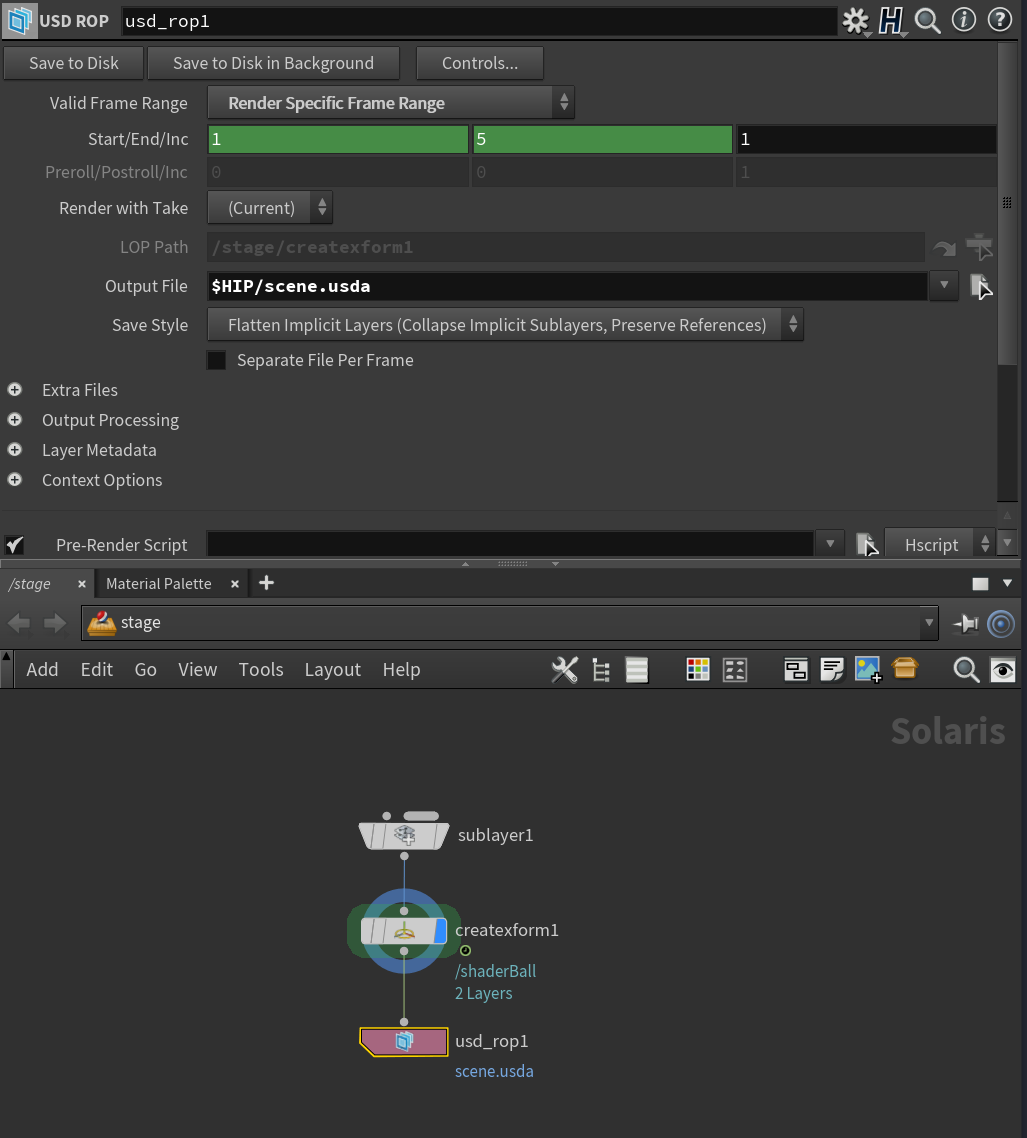
Next, run husk from the command line.
On Windows, launch Command Line Tools.
On macOS/Linux, launch the terminal and follow instructions under Browsing environment variables.
Change to your stage directory.
In our case, it will be
cd C:\dev\hdRprDocs\houdini\general\motionBlur.
Run
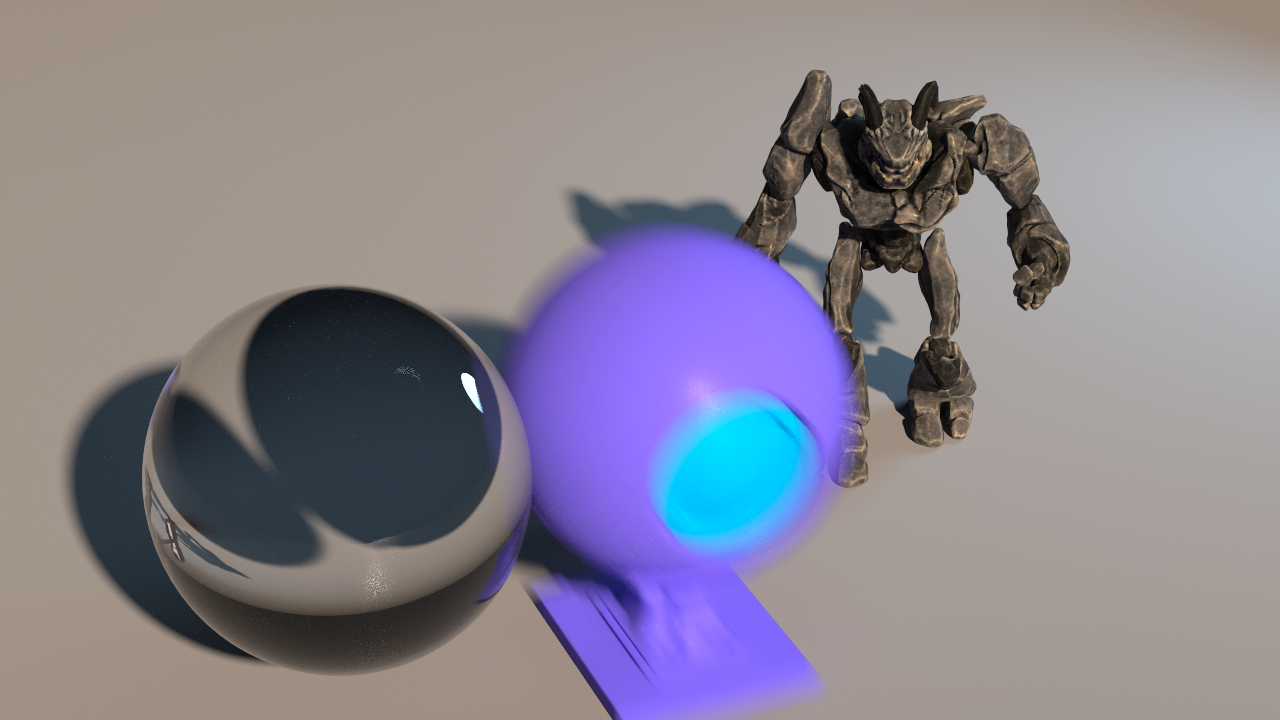
husk -R RPR -f 3 -V 9 -o test_$F3.png test.usda.Check the expected output.
Notes
Motion blur is available for meshes and cameras.
Mesh has motion blur for translation, rotation, and scale; the camera supports translation and rotation only.
You can download the following sample scene to work on.