Menu Items
Opening a USD file (not necessary with a live Inventor connection)
To open a USD file, select the ProRender menu in the upper left corner and select Open. Choose any USD file to open. In the future, we may enable the opening of other 3D data formats.
Please note that for Inventor users, there is no need to open a file, because it will be sent automatically from the Inventor plug-in.
RPR Viewer Settings
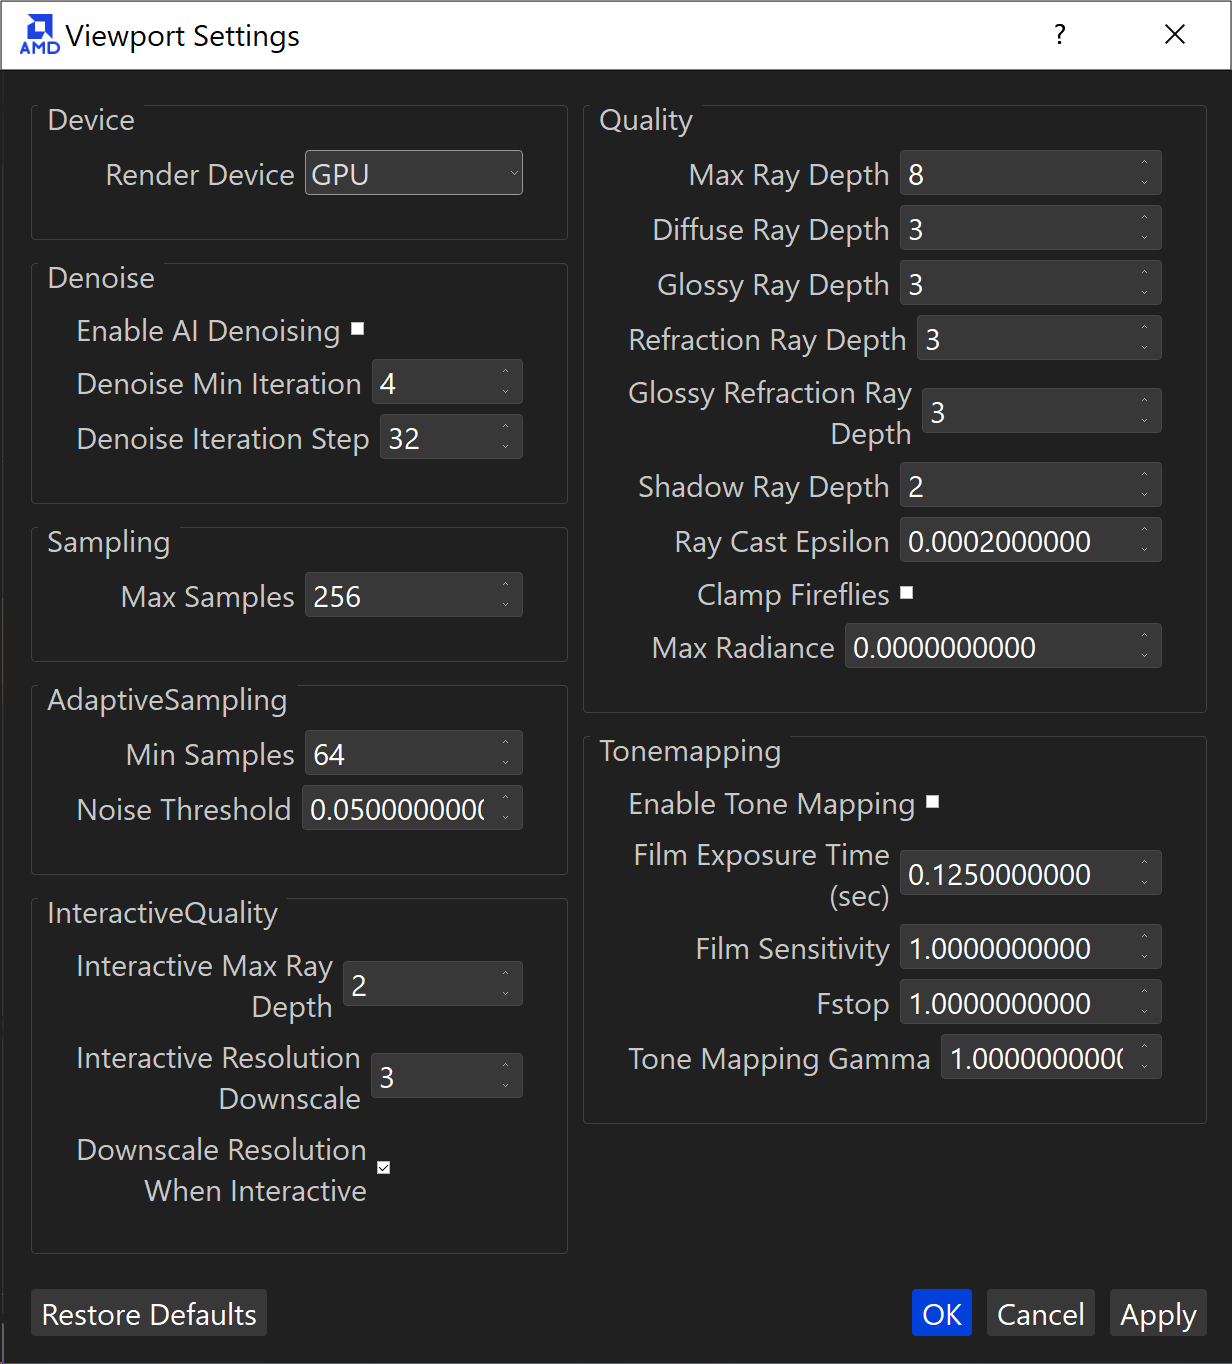
In the menu under Settings, a dialog box will open for Render Settings.
These settings affect the viewport render settings (not the final render settings from the Render tab). They are saved with the user preferences, so the next time a scene is opened these settings will be reused.
Note
This menu will be re-organized in the future.

The settings for users here are:
Render Device ― Select either the CPU or GPU for rendering. For most users we recommend GPU rendering.
Denoiser ― Enabling this will enable the RPR Denoiser function. Being a path tracing renderer, Radeon ProRender randomly samples light rays to create an image. This will create “noise” in the image which gradually cleans up over time. Using smart image filters, and extra information from the renderer, the denoiser will clean up this image with less ray samples.
Sampllng ― The number of ray samples per pixel to use. For viewport rendering, this is less important. A change to the scene or camera will restart the sample count.
Adaptive Sampling ― This sampling mode is enabled by default, and is particularly useful if some image regions are noisier than others, when it is not practical to set the overall sampling rate high and thus oversample the less noisy regions.
Interactive Quality ― These settings control the quality of the image in the viewport while you are changing the camera position or making other modifications to the scene, such as changing IBL orientation. This helps achieve instant previews and allow more responsive editing.
Quality ― Viewport quality allows you to describe the quality of the final image with the ray depth values (that is, the number of times that a ray bounces off various surfaces before being terminated), and helps improve the render result by removing artifacts that might appear in certain cases.
Tonemapping ― These settings are intended to map one set of colors onto another to approximate the appearance of HDR images in a medium that has a more limited dynamic range.
Saving a USD File
To save a USD file, choose Save in the menu to save a USD file. This will save the currently loaded data as well as any changes to lights, materials and comments. These saved USD files can be shared with others for viewing the 3D data.