Installing Radeon ProRender for Blender
This section describes how to download the AMD Radeon ProRender plug-in for Blender, lists system requirements and provides step-by-step installation instructions.
How to Obtain Radeon ProRender for Blender
The latest version of AMD Radeon ProRender for Blender is available at the AMD Radeon ProRender download.
As part of the AMD Radeon ProRender installation, the RPR Material Library should also be installed. You should download the Material Library installer separately. For Material Library installation instructions, see the Installing Material Library. section.
Supported Platforms
AMD Radeon ProRender for Blender runs on both GPUs and CPUs. OpenCL™ 1.2 is required for GPUs.
Software
AMD Radeon ProRender for Blender is compatible with the following applications:
Blender™ 3.0
Blender™ 2.93
Blender™ 2.91
Blender™ 2.90
Blender™ 2.83
Blender™ 2.82
Blender™ 2.81
Blender™ 2.80
Operating Systems
The following operating systems are supported:
Microsoft Windows® 10 (64-bit)
Ubuntu® 18.04.0
macOS® High Sierra 10.13.3+
macOS® Mojave 10.14.0+
macOS® Catalina 10.15
How to Install Radeon ProRender for Blender
AMD Radeon ProRender can be installed from the archive on all supported platforms in the same way:
Download the add-on archive matching your OS from the AMD Radeon ProRender download.
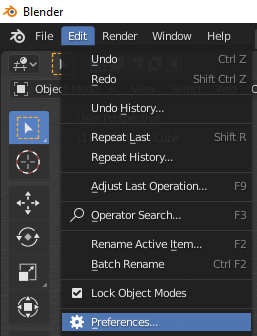
Launch Blender™. Open the preferences windows via the Edit menu by selecting the Preferences option.
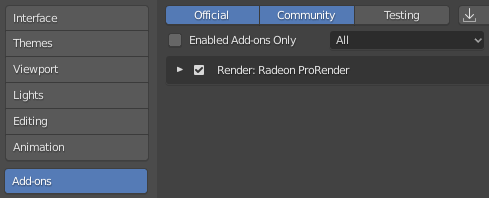
Select the Add-ons tab. Click the Install button.

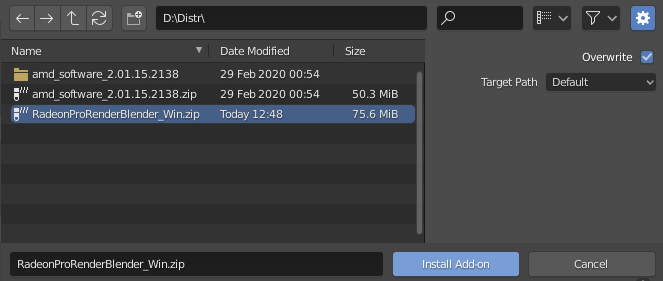
Locate the add-on archive, select it, and click the Install Add-on button.
Enable the add-on by clicking on the check box next to it.
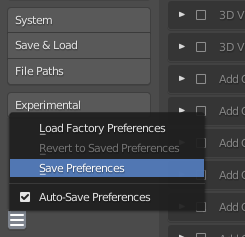
Optionally: save preferences for the active add-on, so you don’t have to enable it each time. Click the button and click the Save Preferences in the menu.

Install the AMD Radeon ProRender Material Library.
For details, see section Installing Material Library.
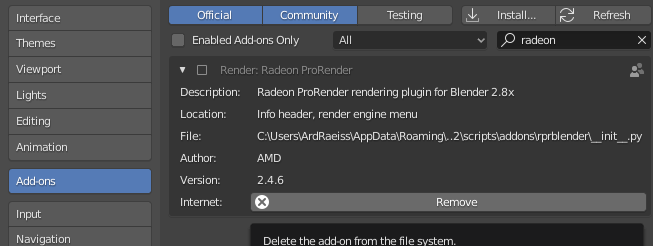
How to Remove Radeon ProRender for Blender
To remove AMD Radeon ProRender for Blender:
Open the Preferences window, then go to the Add-ons section.
Type ‘radeon’ in the Search field to find the installed add-on in the add-ons list.

Click the check box next to the add-on name to disable it.

Steps 4 to 6 are for Windows only.
Save Preferences.
Close all the Blender application instances. This step is mandatory for correct add-on removal/update.
Launch Blender, open the Preferences window, select the Add-ons section.
Type ‘radeon’ in the Search field to find the installed add-on in the add-ons list.
Click the triangle next to the add-on name to open the add-on settings.
Click the Remove button to remove the add-on from this Blender version.
Save Preferences.
How to Update Radeon ProRender for Blender
To update the Radeon ProRender for Blender add-on to the newer version:
Remove the existing add-on version.
See the How to Remove Radeon ProRender for Blender section for details.
Install the new version from the archive.
See the How to Install Radeon ProRender for Blender section for details.