Depth of Field
AMD Radeon ProRender supports Depth of Field (DoF) settings to help you achieve a higher level of realism in rendered images and make them more appealing. Every real-world camera lens has a focus distance, and objects outside that focus distance appear slightly blurred, depending on the size of the aperture. Depth of field replicates this effect.
DoF of a scene is the distance between the nearest and farthest objects that appear acceptably sharp in the image. The area within the DoF appears sharp, but the areas beyond it appear blurred.
The DoF effect allows you to focus on particular objects or regions in the scene, while blurring the surrounding foreground and/or background. This technique is often used to add more prominence to the desired object in the scene and keep the other objects out of focus.
DoF disabled |

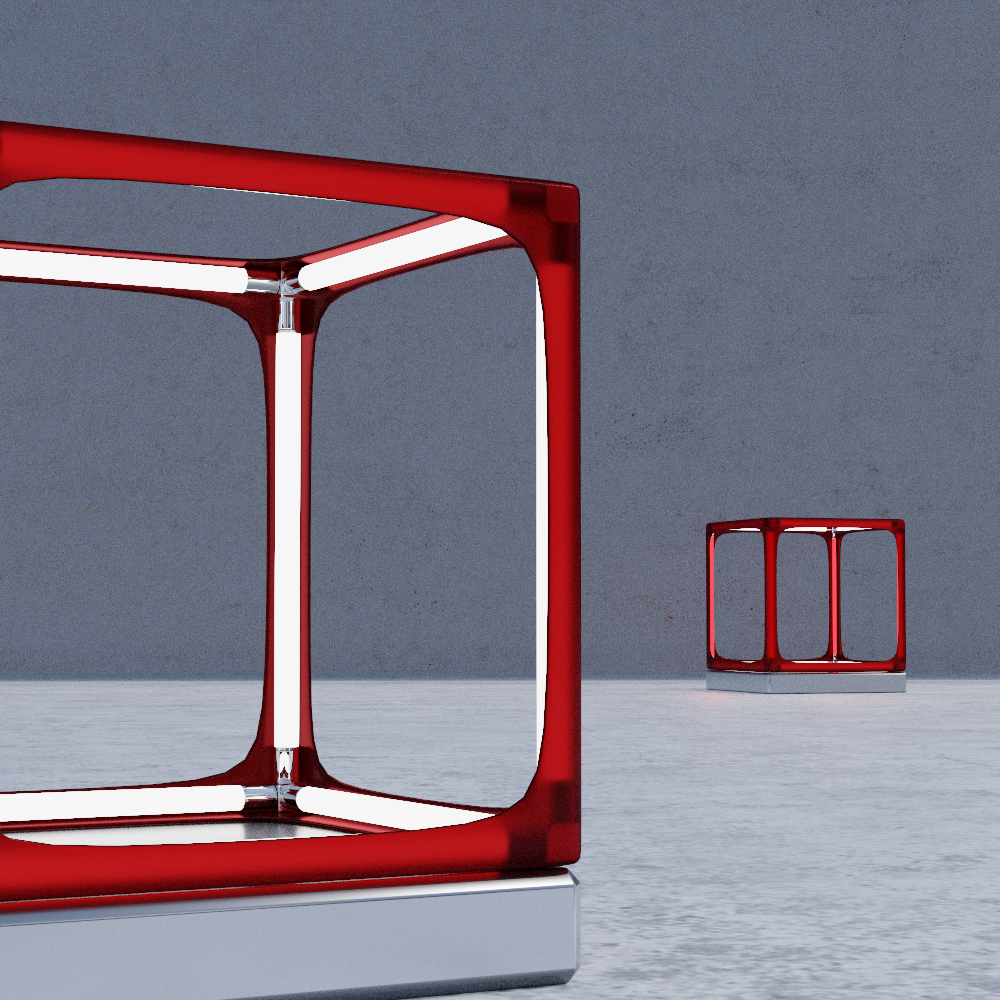
Closer object in focus |
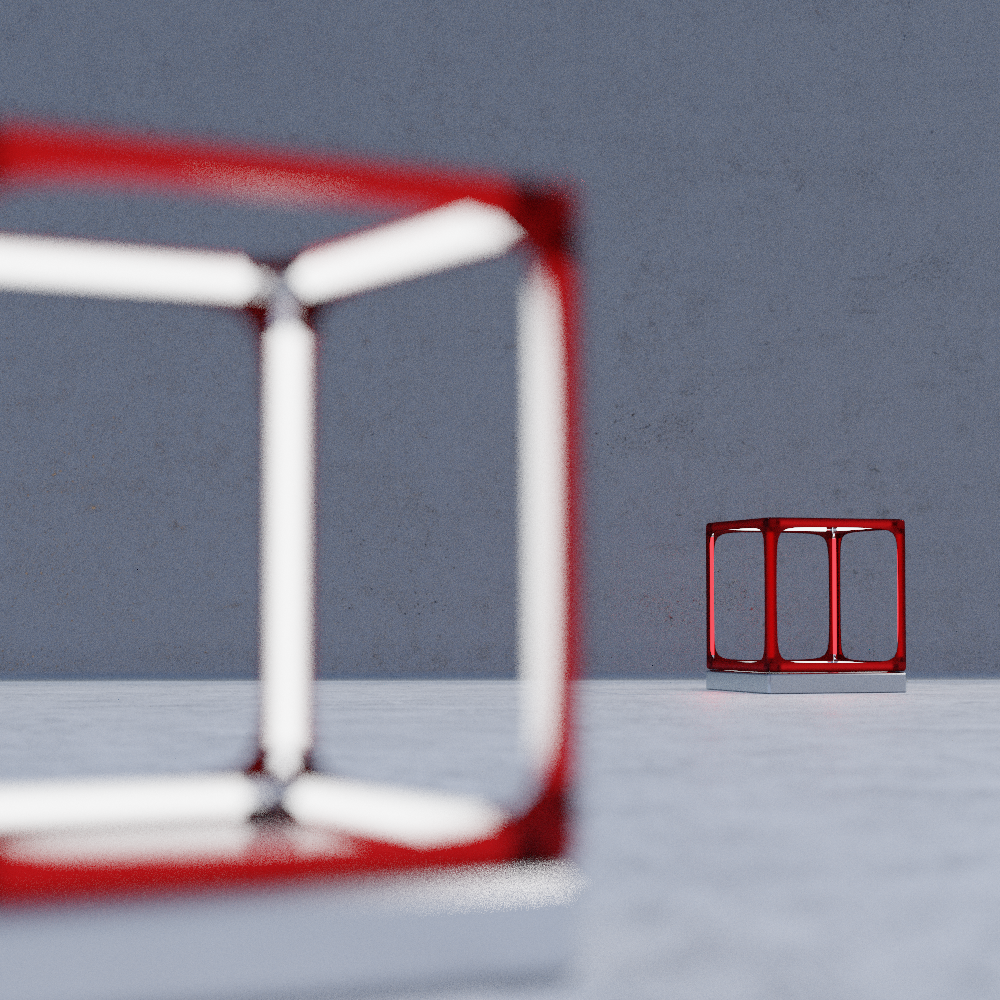
Farther object in focus |
Enabling Depth of Field
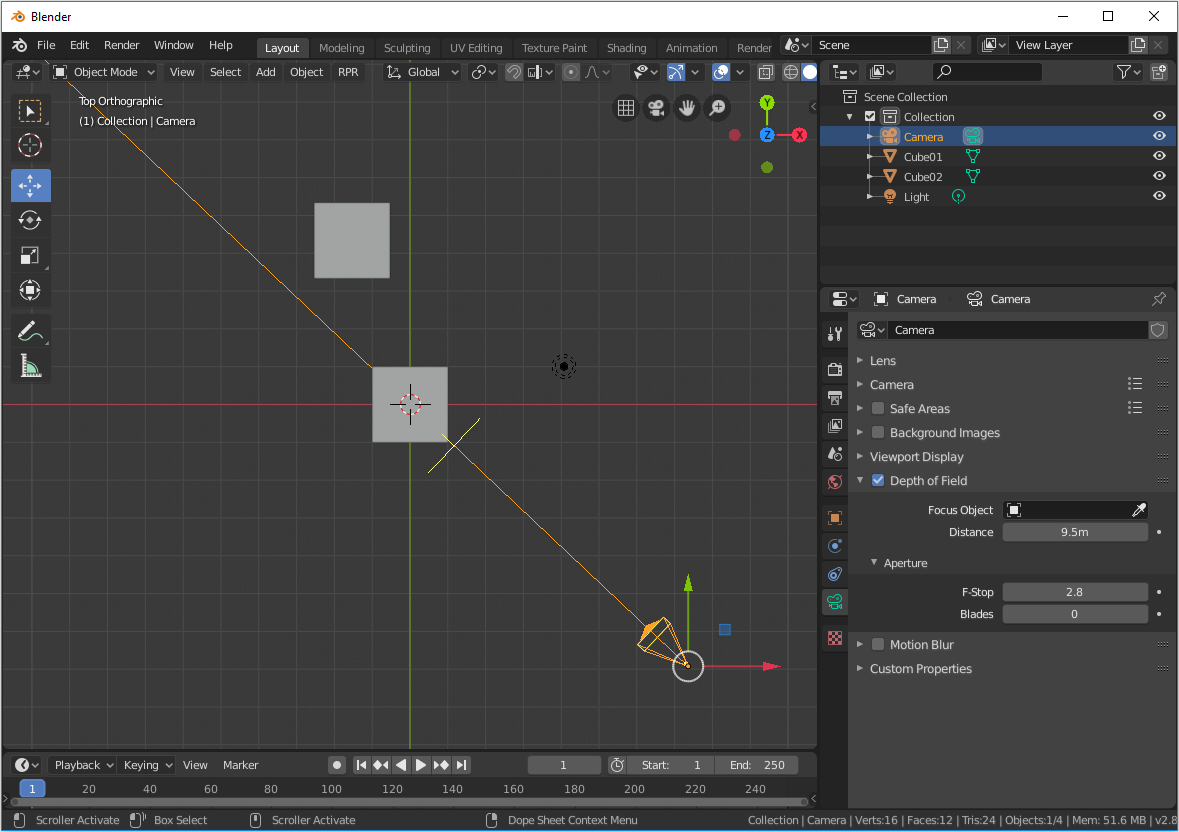
DoF is enabled on a per-camera basis. If there are multiple cameras in the scene, make sure you configure DoF settings of the render camera.
To access the DoF settings:
Make sure that AMD Radeon ProRender is set as the active render engine in Blender.
For details, see Switching to Radeon ProRender for Blender.
Select the necessary camera in the scene.
In the Blender Properties editor, switch to the Object Data tab.
Expand the Depth of Field panel and specify the necessary DoF settings.
In AMD Radeon ProRender, DoF is controlled using the following parameters.
Focus on Object
The focal point can be constrained to a particular object in the scene. You can either select an object in the list, or use the eyedropper to pick an object in the scene. Linking to an object might be particularly useful to achieve precise control over the focus position in animated scenes.
Focus Distance
If no in-focus object is chosen, you can set the distance to the focal plane in scene units. Setting the focus distance might be useful to focus on a certain region of the scene rather than an object. To preview the focal plane location in the scene, switch to the top view and enable the Limits option in the Viewport Display camera settings.
Aperture
The aperture parameters describe the appearance of the out-of-focus blur in the image.
F-Stop
F-stop controls the strength of the blur for areas out of focus to make the DoF effect more apparent.
At smaller F-stop values, the intensity of blur is increased, and the DoF appears shallow. Greater values produce less blur and make the DoF effect subtler, with more gradual falloff and sharper foreground and background.
Compare how the intensity of blur changes with the F-stop values set to 5, 10 and 20.

F-Stop: 5 |

F-Stop: 10 |

F-Stop: 20 |
Blades
A shallow DoF separates the object in focus from the background and generates the bokeh effect, which is a smooth, uniform and aesthetically pleasing blur for points of light in the object’s background.
The Blades parameter allows you to set the number of blades that make up the aperture of the virtual camera and, as an effect, give shape to bokeh.
For example, the value of 6 will give a hexagon shape running around the edge. The bokeh spots taking the aperture shape will appear as soft hexagons in the image. Increasing the number of blades makes the bokeh shape more rounded and smooth, closer to a perfect circle, which is often the desired background blur effect.

Blades: 4 |

Blades: 6 |

Blades: 16 |
Notes
Consider a few notes regarding DoF:
If the focus distance is set to 0 and no object is selected, all objects in the scene will appear in focus.
In the viewport, the DoF effect is visible only when rendered in the camera view.
Changing the number of blades does not affect the image in the viewport but does affect it in the final render.
A more pronounced blurring generally produces more noise and requires more samples to clean up.