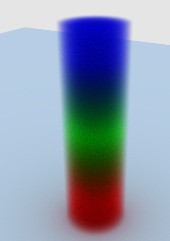
Volume

The Volume demo illustrates how to create volume material in RPR.
The volume feature is used for materials that cannot be represented by hard surfaces, for example smoke or cloud. In RPR, a Volume (also called Heterogeneous Volume) is mainly defined by grids (rpr_grid).
A grid can be seen as a 3D-Texture. However, grids can only contain scalars, which means that for Volume color, we may need to use a lookup table to bind scalars to colors (that is the job of the rampSampler2 material in the tutorial).
Grids are defined inside a 3D box (scaled and positioned by rprShapeSetTransform()). We can’t define a grid inside a shape’s geometry. In other words: if you want to create a teapot-volume, you can’t use the bounds of a teapot-vertices-shape: you need to ‘draw’ your teapot as a density map inside a 3D grid.
In the tutorial, we create an empty shape ( as said previously vertices can’t be used as bounds ) with the special flag RPR_MESH_VOLUME_FLAG=1.
Then we create two grids:
Rprgrid1 defines the density of the volume. It defines a cylindrical shape;
Rprgrid2 is used for color and defines a ramp 0->1 along the ‘up’ axis.
In order to use the grid inside the material graph, you need a grid sampler (RPR_MATERIAL_NODE_GRID_SAMPLER). The input of the grid sampler is an rpr_grid, output is the interpolated scalar.
The volume material is created with any classic material node:
rprMaterialSystemCreateNode(matsys, RPR_MATERIAL_NODE_VOLUME, &materialVolume);Then, we connect gridSampler1 to the DENSITYGRID in order to have a cylindrical volume, and connect rampSampler2 to the COLOR for this red, green, and blue shading.
Note that it is better to increase MAX_RECURSION so as to increase the light penetration inside the volume.
rprContextSetParameterByKey1u(context, RPR_CONTEXT_MAX_RECURSION, (rpr_uint)5);