Basic Scene Demo
The Basic Scene demo is a good starting point to learn all the basic features of Radeon ProRender (RPR). You’ll learn how to manage the scene, geometry, light, camera, framebuffer and materials to render simple cubes.
Scene
A scene is a container of nodes that we want to render. RPR can manage multiple scenes per context. A scene is created with rprContextCreateScene().
Camera
The camera defines the ‘eye’ inside the scene. The scene’s camera is created with rprContextCreateCamera(), positioned with rprCameraLookAt(), and defined as the main rendering camera with rprSceneSetCamera().
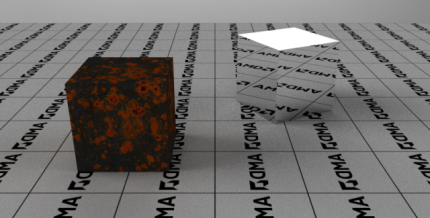
Shape
rpr_shape is the geometry inside the scene. The scene’s geometry is created with rprContextCreateMesh(), positioned with rprShapeSetTransform(), and attached to the scene with rprSceneAttachShape().
Light
A scene needs at least one light to enable rendering. In this demo, we create a point light with rprContextCreatePointLight(), then use rprLightSetTransform() and rprPointLightSetRadiantPower3f() to set its parameters, and finally we need to attach it to the scene with rprSceneAttachLight().
Framebuffer
rpr_framebuffer is the buffer that stores the rendering result. It is created with rprContextCreateFrameBuffer(). In this demo, we need two framebuffers: the first one is the ‘raw’ framebuffer which is not meant to be visually exposed, and the ‘resolved’ framebuffer which will contain the final render that can be displayed on the screen.
Note that we need to attach the ‘raw’ framebuffer to the Color AOV with rprContextSetAOV(), so that the renderer knows which framebuffer it outputs its results to.
Rendering
Our code is now ready for rendering. We only need to define the number of iterations we want, which is done with rprContextSetParameterByKey1u(context,RPR_CONTEXT_ITERATIONS, N). The more iterations we use, the better the quality will be. Note that having RPR_CONTEXT_ITERATIONS=N is pretty much the same thing as calling rprContextRender() N times. However, performance is better when using RPR_CONTEXT_ITERATIONS.
The rendering process is started with rprContextRender. This call is synchronous (as in most of the RPR APIs). There are ways to call rprContextRender() in a separate thread, but this won’t be done in this tutorial.
After rendering, we fill the ‘resolved’ framebuffer from the ‘raw’ one, which is done with rprContextResolveFrameBuffer(), and we export the ‘resolved’ framebuffer into an image file with rprFrameBufferSaveToFile().
This has been a basic RPR rendering! From this point onwards, this tutorial will be exploring a few more RPR features, and shows how we can dynamically modify the scene for new renders.
Material
Materials define the surface of the geometry. A material is created with rprMaterialSystemCreateNode, a material node having one constant type (RPR_MATERIAL_NODE_DIFFUSE, RPR_MATERIAL_NODE_REFLECTION …), and rprMaterialNodeSetInput*, which is used to define each material input. Then we use rprShapeSetMaterial() to apply the material to the shape.
Environment Light
This tutorial also uses an environment light (rprContextCreateEnvironmentLight()). This light is like an infinite sphere surrounding the camera. It needs an image (rprEnvironmentLightSetImage()) to define the color in every direction. Like any other light, it needs to be attached to the scene with rprSceneAttachLight() (for this particular type of light, we can use the equivalent call: rprSceneSetEnvironmentLight()).
Cleaning
The API user is responsible for cleaning up the memory: if an object is no longer used, we need to call rprObjectDelete() to delete this object from the memory. Using CheckNoLeak just before deleting the Context could be good practice to ensure the memory is managed correctly.