Using Uber Shader in 3ds Max
The Uber Shader is a multi-purpose shader intended for creating a wide range of real-world materials in 3ds Max. Covering all of the material effects that artists usually need, the Uber Shader allows creating materials of virtually any complexity.
The Uber Shader consolidates a number of components, or layers, that group certain properties of physical materials. You can mix these layers in the material to achieve the necessary result. In AMD Radeon ProRender for 3ds Max, the Uber material can include the following layers:
Enabling a component activates its properties and allows you to adjust the settings of the material layer. Note that the Uber Shader comes with physically correct default values and soft limits for the material’s properties. Using values below or above these limits will generally distort physical correctness of the material.
To learn about the settings available for the material’s layers, refer to the sections that describe the Uber Shader components.
Considerations and Limitations
You may wish to consider the following before you start to create new materials using the Uber Shader:
When the Subsurface component is enabled, the diffuse backscattering is activated automatically (if the backscattering weight value was zero), as SSS requires the material to transmit light.
Uber Material Examples
To see examples of how to use the Uber Shader, you can start with the materials available in the Material Library. All the materials in this Library rely on the Uber Shader and could be good options to get started. Simply import a material from the library and try playing with its presets to achieve a better understanding of how the Uber Shader works.
Adding Uber Material
To create an Uber material and assign it to an object in 3ds Max:
Make sure that Radeon ProRender is selected as the active renderer in 3ds Max.
Select the object in the scene.
Open the Slate Material Editor.
In the Material/Map Browser section, expand Materials > Radeon ProRender.
Locate the RPR Uber Material and drag it to the active View, or double-click it.
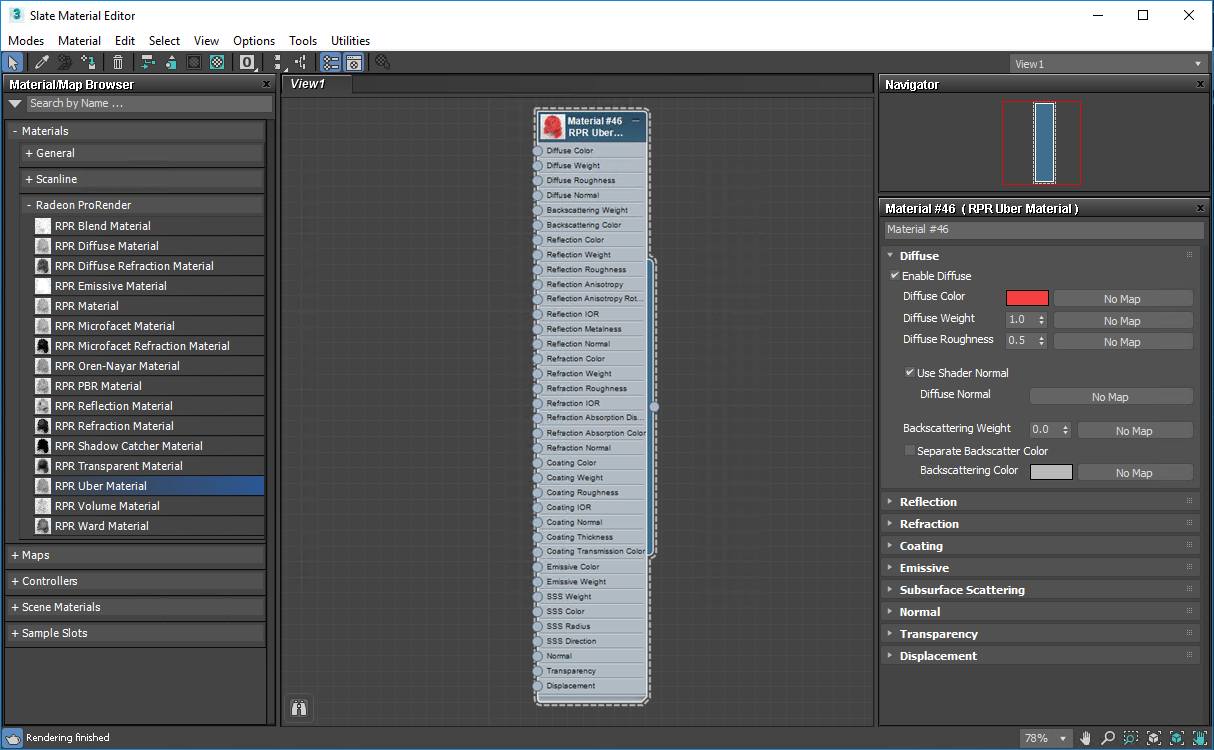
Double-click the RPR Uber Material node in the active View to display RPR Uber settings in the Material Parameter Editor.
Right-click the Uber material in the active View and choose Assign Material to Selection.
Adjust material properties in the Material Parameter Editor and assign maps in the active View.
To add a layer to the Uber material, expand it in the Material Parameter Editor, select Enable and tune its settings. For details on the supported input types, see the documentation topics on Uber components.
Example
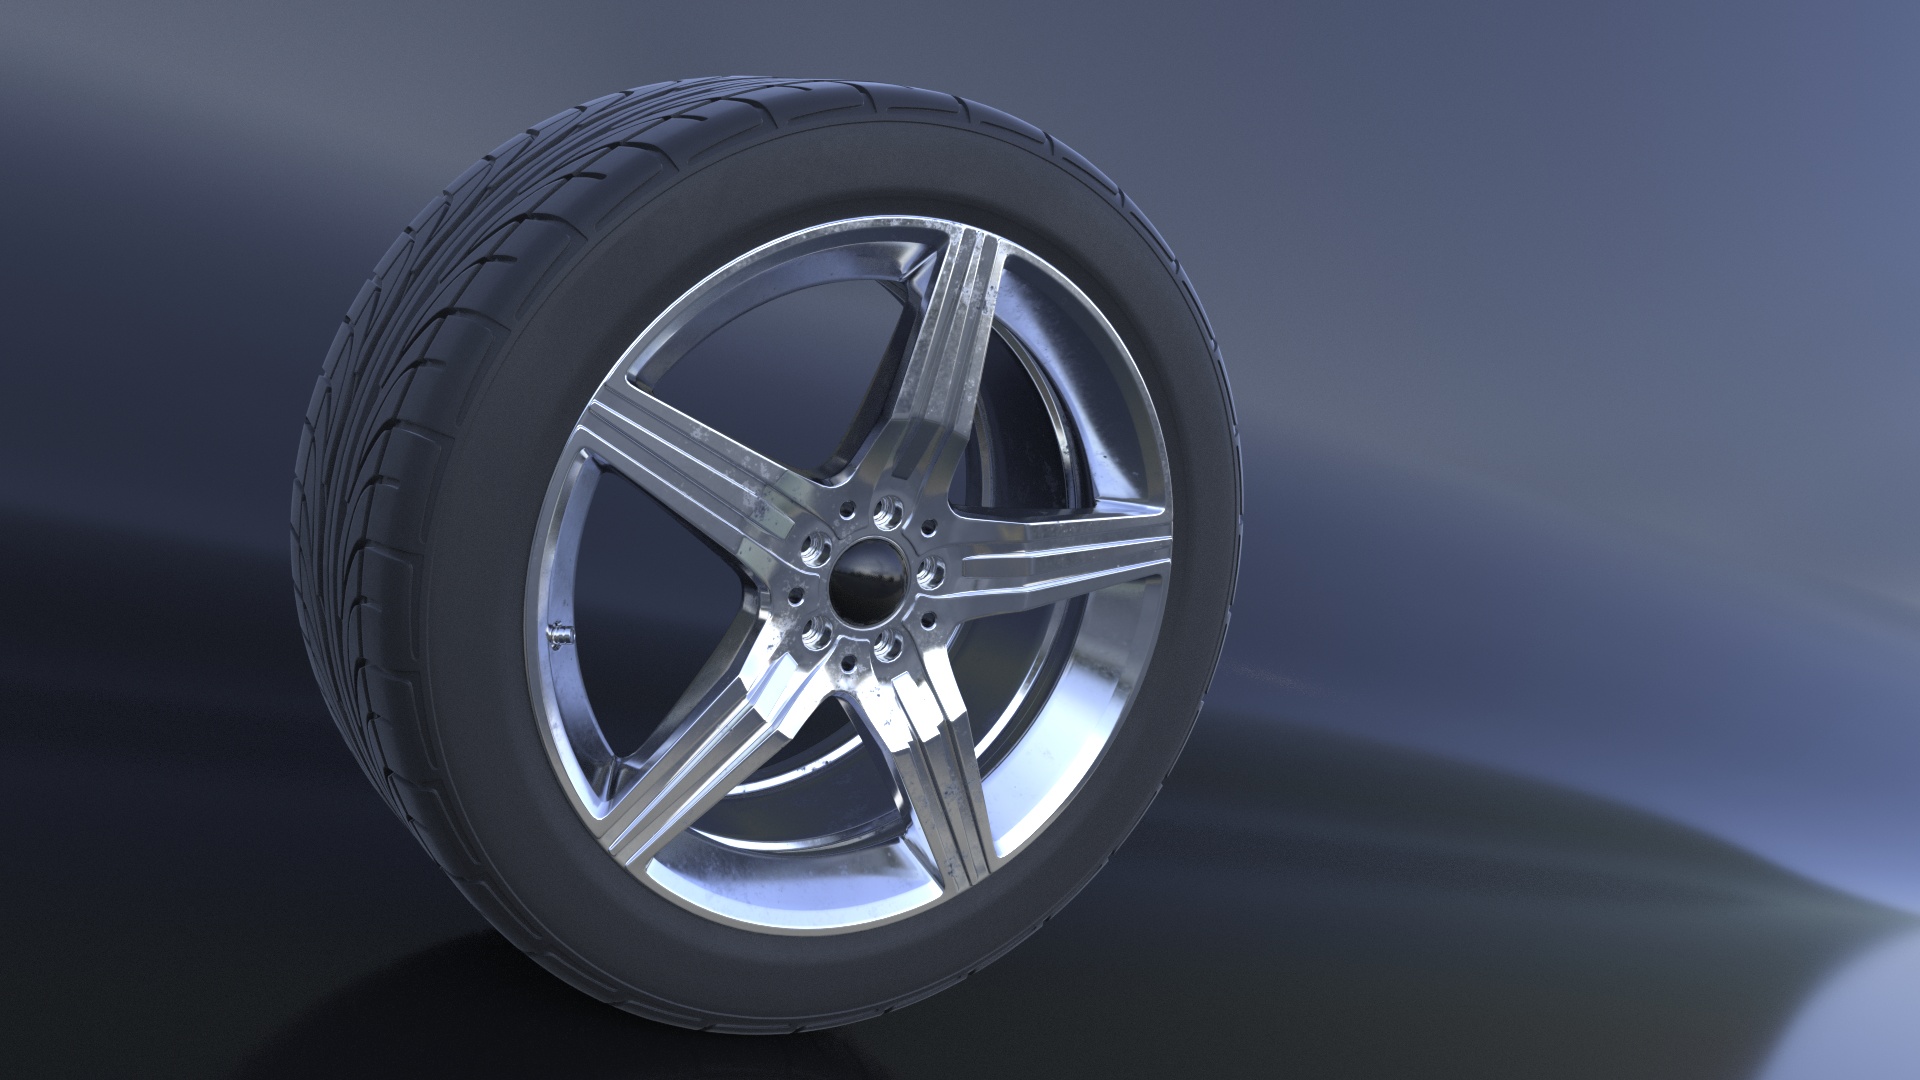
This example shows how to set up the Uber materials for a car wheel scene.
For the scene, we need two materials:
Rubber material for the tire
Metallic material for the wheel rim
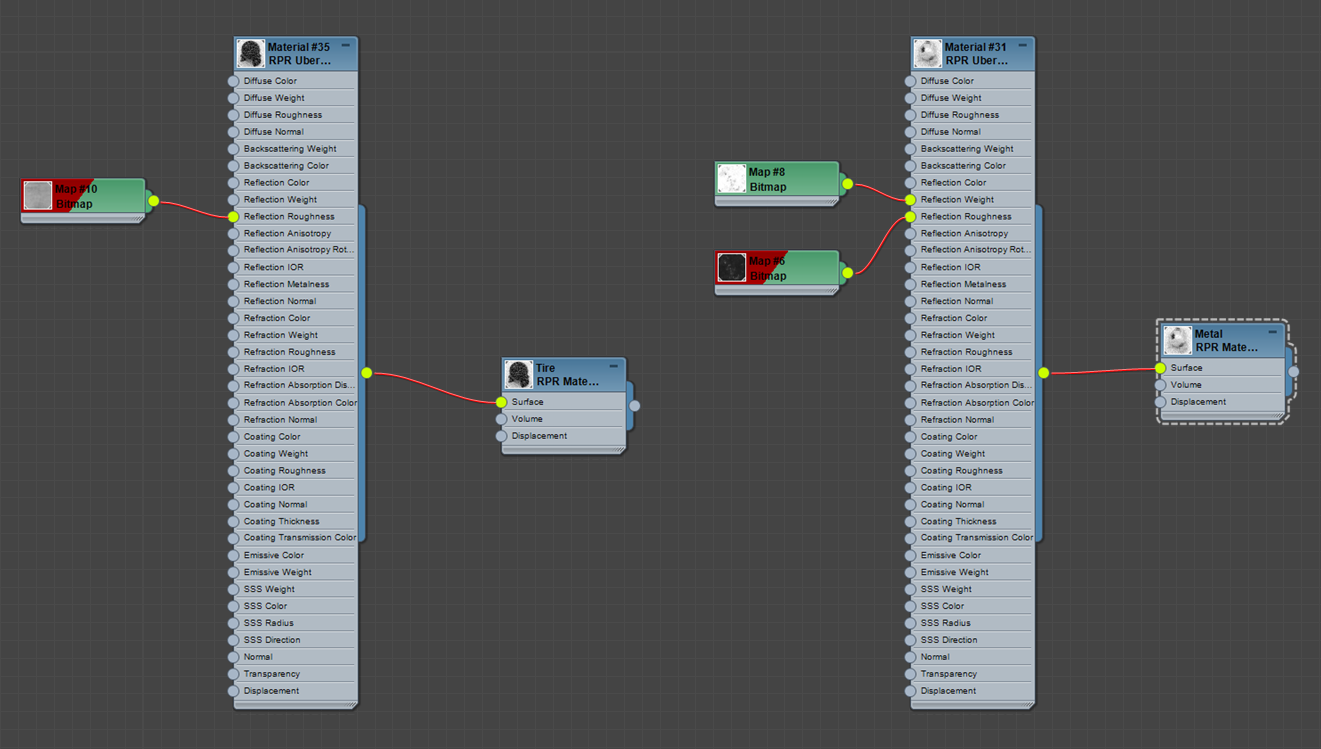
Tire
For the material of the tire, the two layers are used: the diffuse layer to set the base material color, and the reflection layer to describe reflectivity properties of the tire surface. To create a non-uniform reflection roughness for the tire surface, a texture map is used.
Rim
The metallic material for the wheel rim is represented with the reflection layer only. The reflection mode is set to Metalness, with the metalness value of 0.7. To add scuffs and erosion to the surface, a texture map is used as the weight input, and an inverted map is set for the reflection roughness.
See the nodes setup for the tire and wheel rim materials below.
Render Result
The following image shows the render result for both materials.