Quality
AMD Radeon ProRender offers a number of settings to control the quality of the final render.
Render Engine
This is an experimental feature that allows you to switch between render engines.
RPR1 is the legacy render engine.
RPR2 is the new default render engine. Please expect that some functionality is unavailable or might not work as described. For a list of forthcoming features, see Release Notes.
Final Render Quality
In the Final Render Quality section, you can choose the necessary full spectrum rendering (FSR) mode for the final render.
Final Render Ray Depths
When an image is rendered, multiple light rays are emitted through each pixel of the image plane. As they encounter obstacles, the light rays bounce around the scene contributing to the surface color and brightness, and this process might be as long as infinite, whereas for a decent render output, a limited number of ray bounces is usually sufficient.
In AMD Radeon ProRender, the number of times that a ray bounces off various surfaces before being terminated is controlled with the Ray Depth parameters.
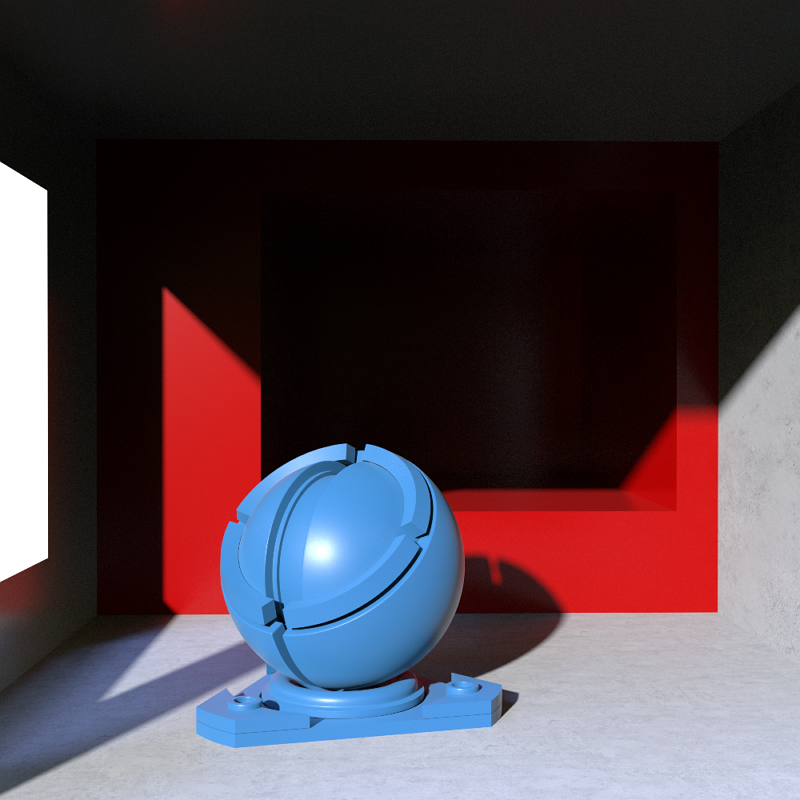
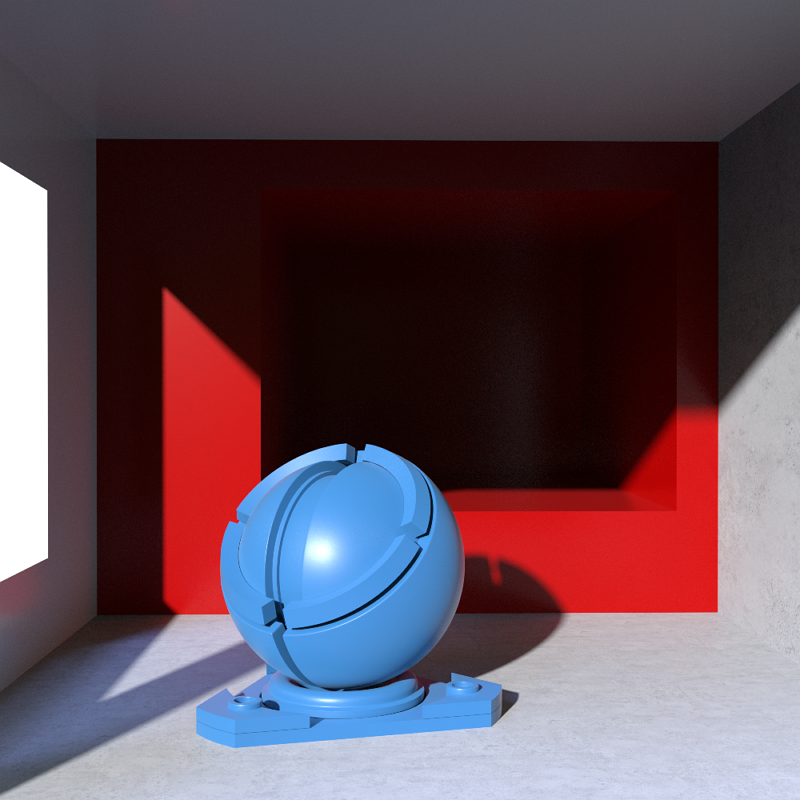
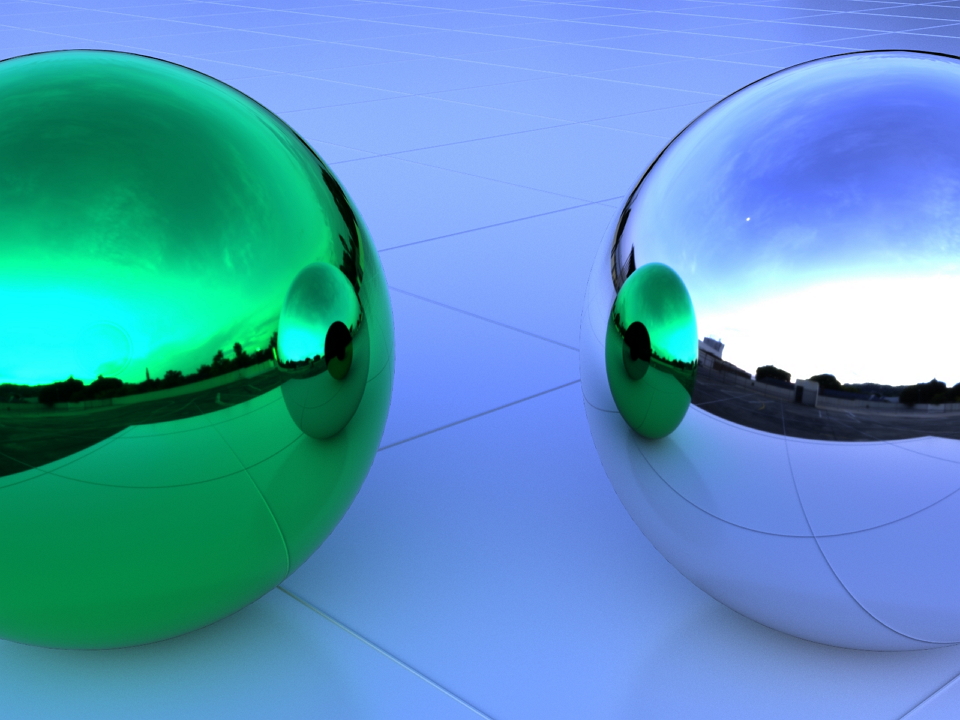
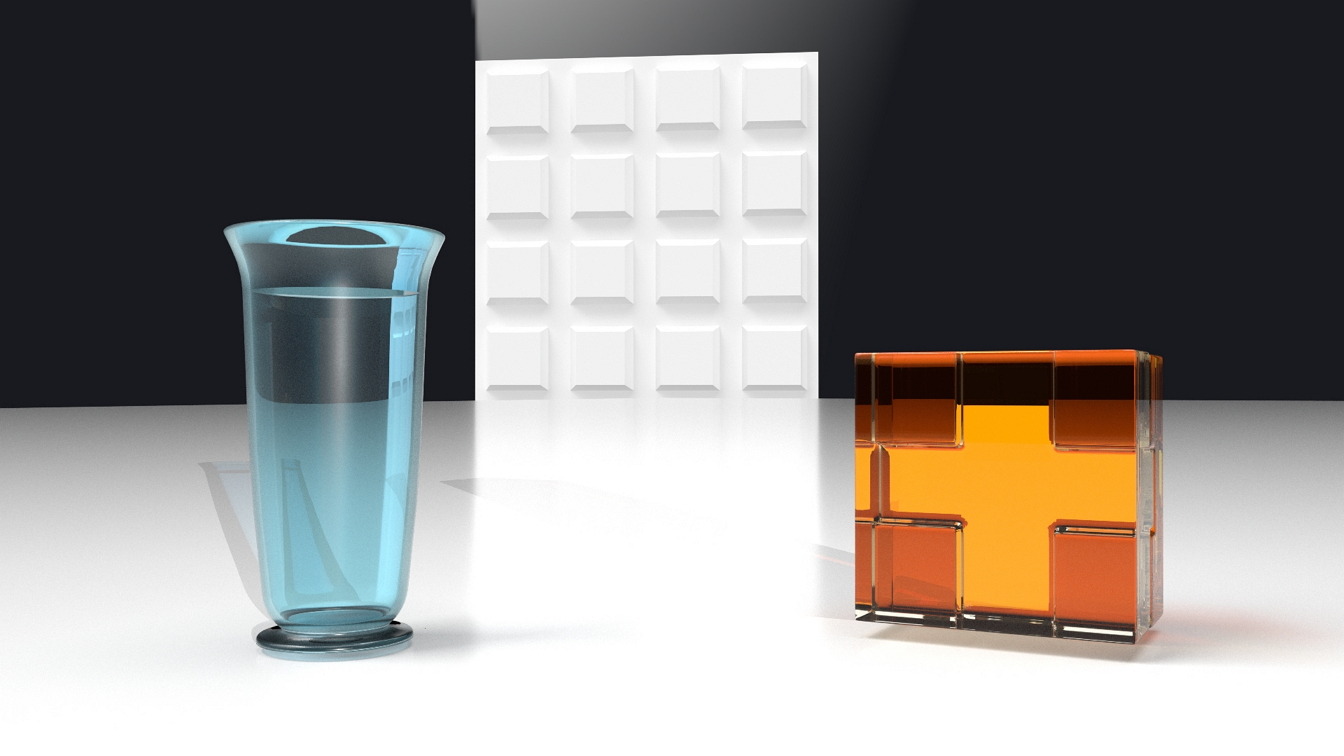
Compare the image quality with the Max Ray Depth set to 1, 2, 5, 10 and 20. The transparency and color of the object is improved with more ray bounces. When the value is set to 1, the object appears black because the surrounding light cannot reach the inner surfaces due to the low ray bounce value.
|
Increasing the ray depth results in more time taken to complete the rendering process. When looking for a compromise between the render time and the image quality, start with the defaults offered by the plug-in and experiment with greater values. A good rule of thumb is to increase the ray depth if there is missing light or you feel there should be complex light paths in the rendered scene.
In AMD Radeon ProRender, the ray depth can be limited separately for different types of surfaces, such as diffuse, glossy, refraction, glossy refraction or shadow. This allows you to describe how many bounces light should take for each surface type, and might be particularly useful for scenes with certain types of materials predominating, as this helps optimize the render time.
Max Ray Depth
The Max Ray Depth parameter limits the total number of ray bounces for all types of surfaces and components, whether they are diffuse, reflective or refractive. This threshold cannot be exceeded even if the sum of Max Ray Depth values for specific surfaces is greater than the specified total.
In general, the default value of 8 is suitable for most scenes, unless these scenes include translucent or complex materials. The soft Max Ray Depth limit ranges from 2 to 50, which is also true for all other ray depth values. However, you can set a smaller or greater value manually.
Note
To enable caustics for refractive materials, set the Max Ray Depth value to at least 2. At a smaller value, no caustics effect will be present.
Max Diffuse
The Max Diffuse parameter controls the maximum number of times that a light ray can be bounced off diffuse surfaces. In general, greater Max Diffuse values make the scene brighter by providing more bounce light to the scene. It is rare to need a Max Diffuse value greater than 3, as this will usually have negligible effect.
Compare the appearance of the scene as the Max Diffuse is increased.
Max Diffuse: 1 |
Max Diffuse: 2 |

Max Diffuse: 3 |
Max Glossy
The Max Glossy parameter controls the maximum number of ray bounces from specular surfaces. This value does not need to be large for scenes with rough surfaces, while for scenes with perfectly smooth and mirror surfaces the Max Glossy value needs to be increased to capture specular reflections.
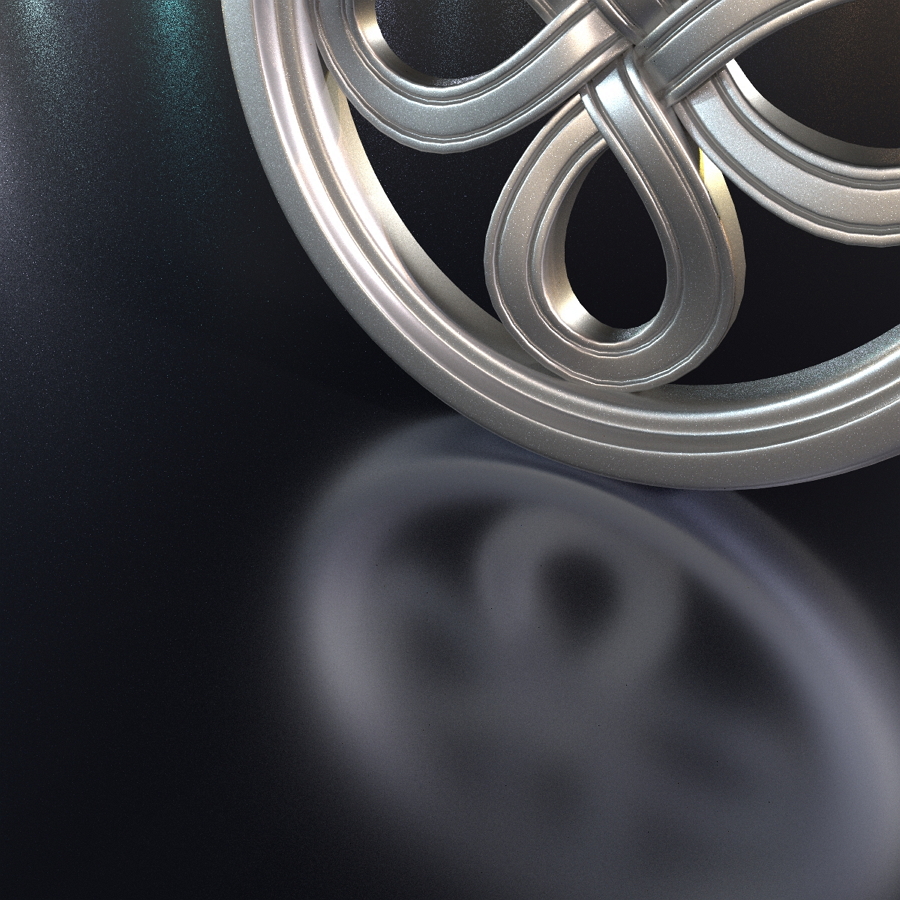
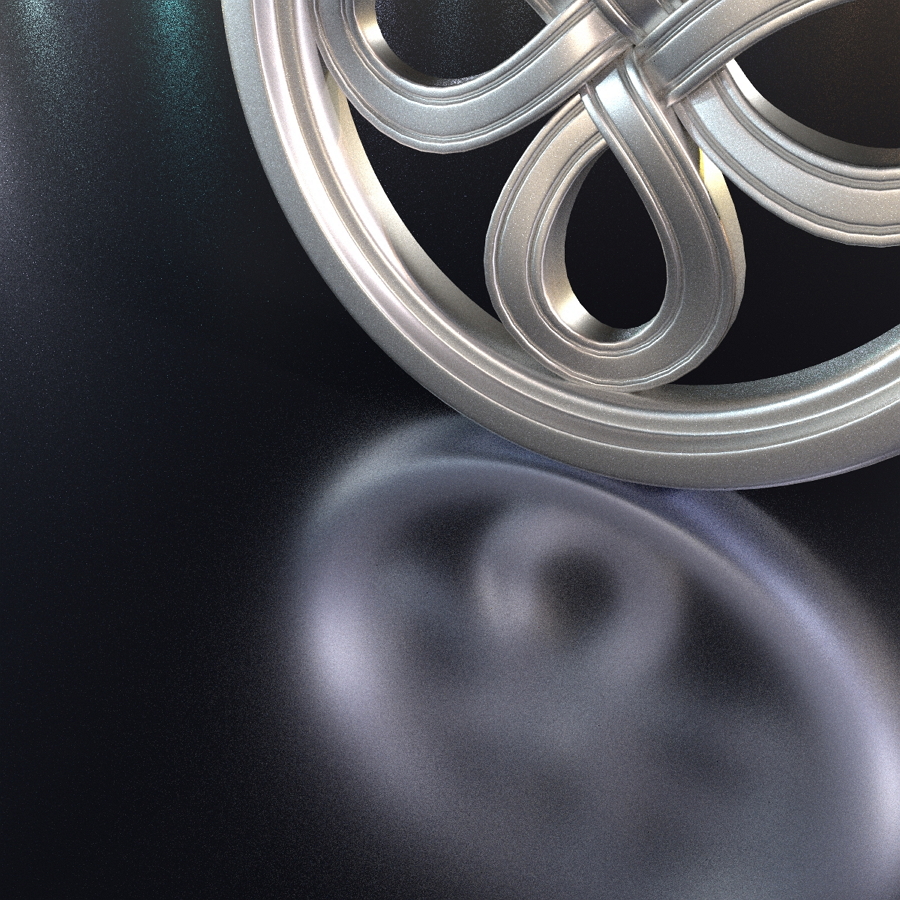
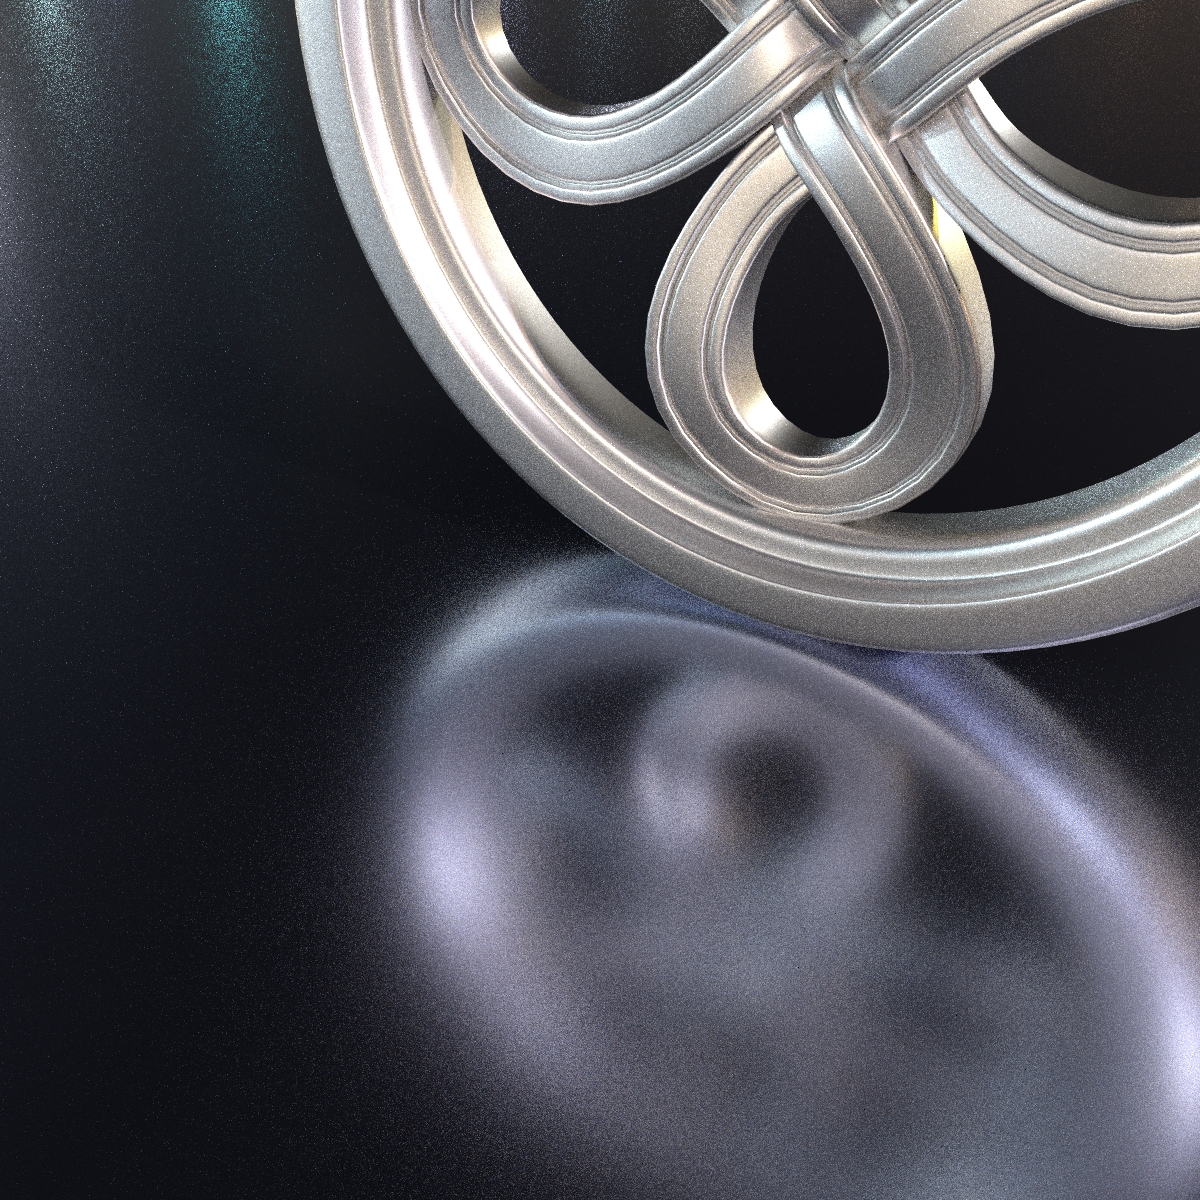
See the number of reflections with the Max Glossy set to 1, 2 and 3.

Max Glossy: 1 |
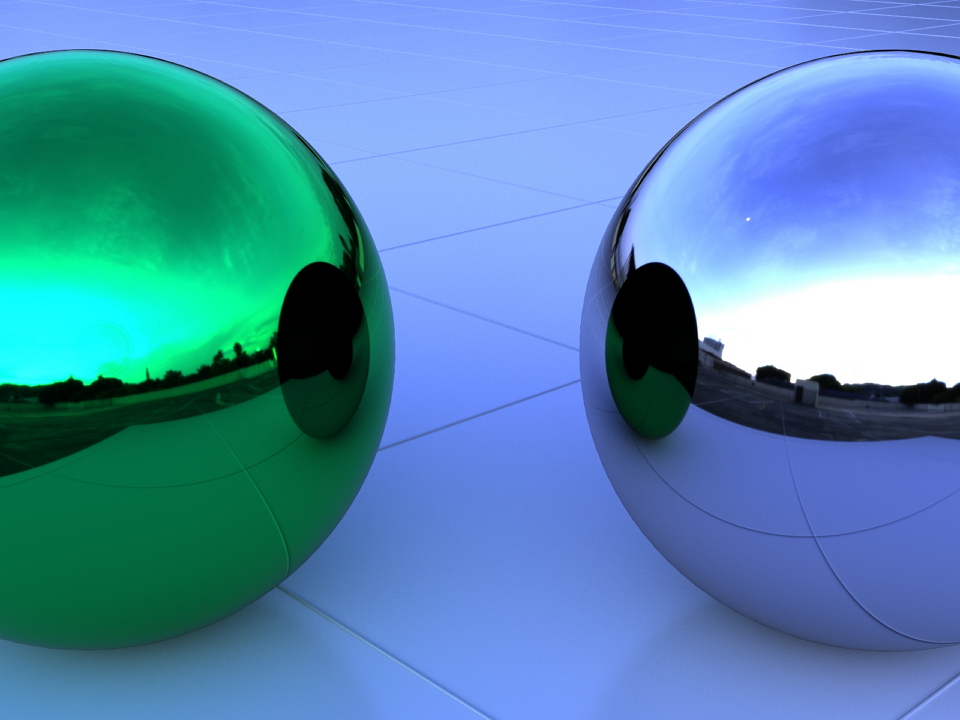
Max Glossy: 2 |
Max Glossy: 3 |
Max Refraction
The Max Refraction parameter controls the maximum number of times that a light ray can be refracted, and is designated for clear transparent materials, such as glass.
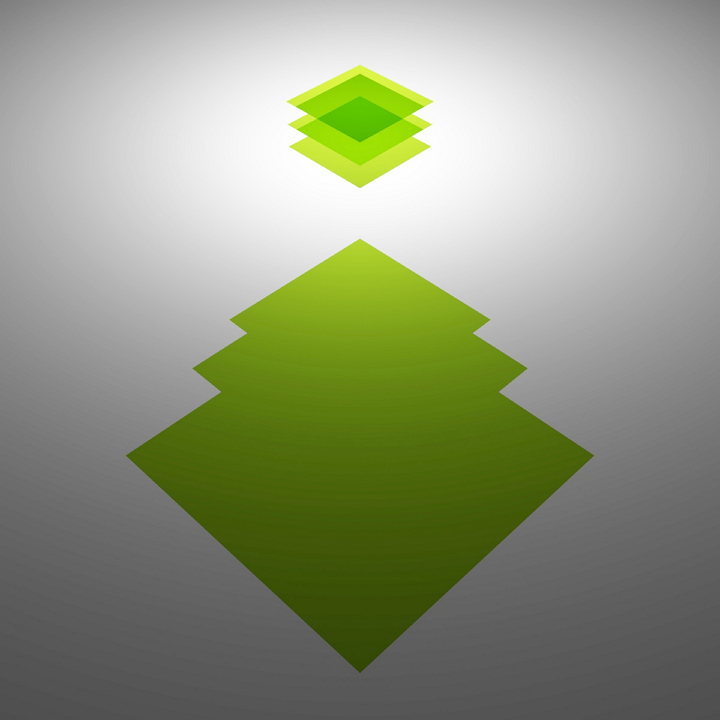
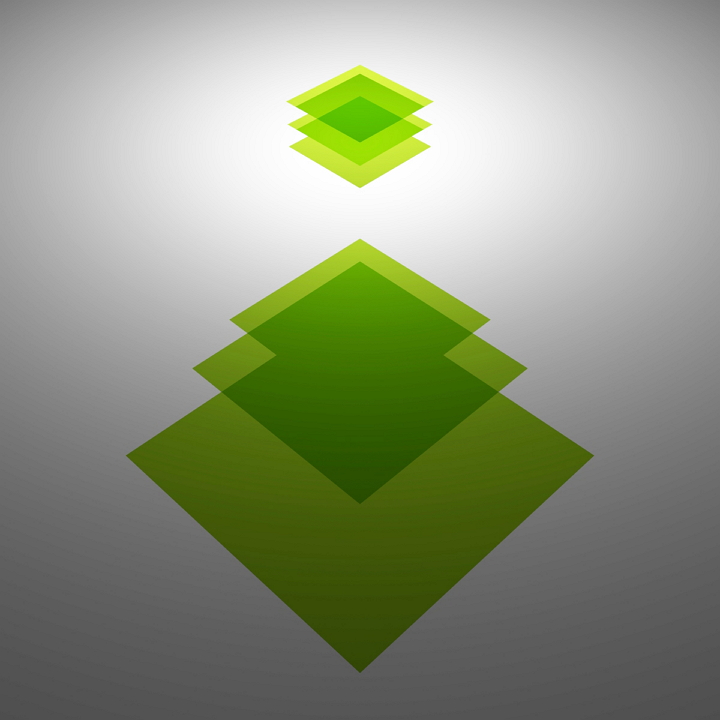
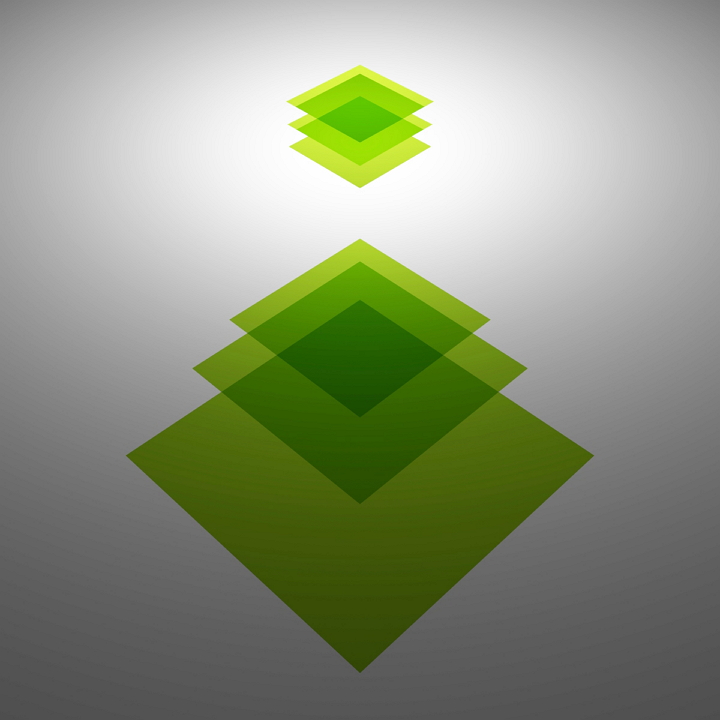
The Max Refraction value should be set large for scenes with many nested transparent objects. The following examples demonstrate how an increase in the refraction ray depth affects the transparency of objects made of thick glass stacked one behind another. Note that for each object, the light ray is refracted twice: once upon entering the glass, and once upon exiting it.
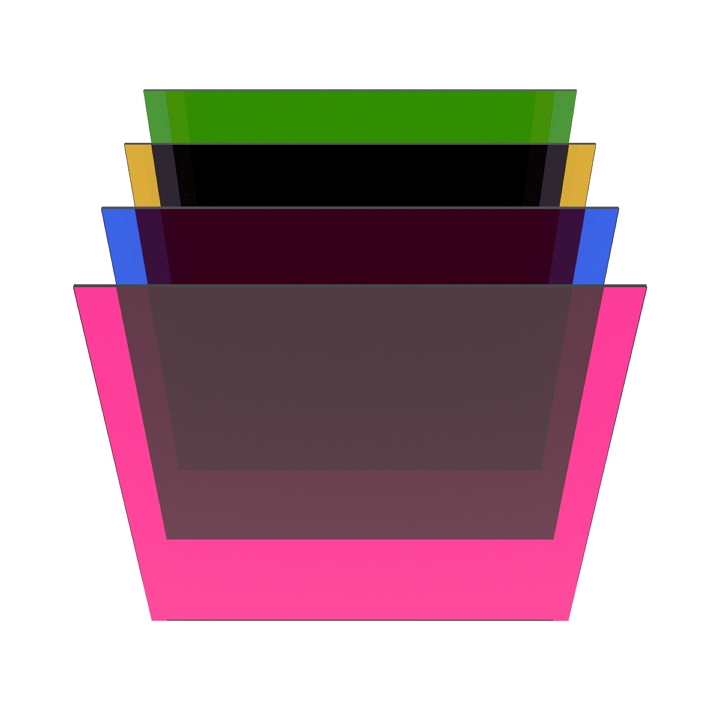
Max Refraction: 2 |
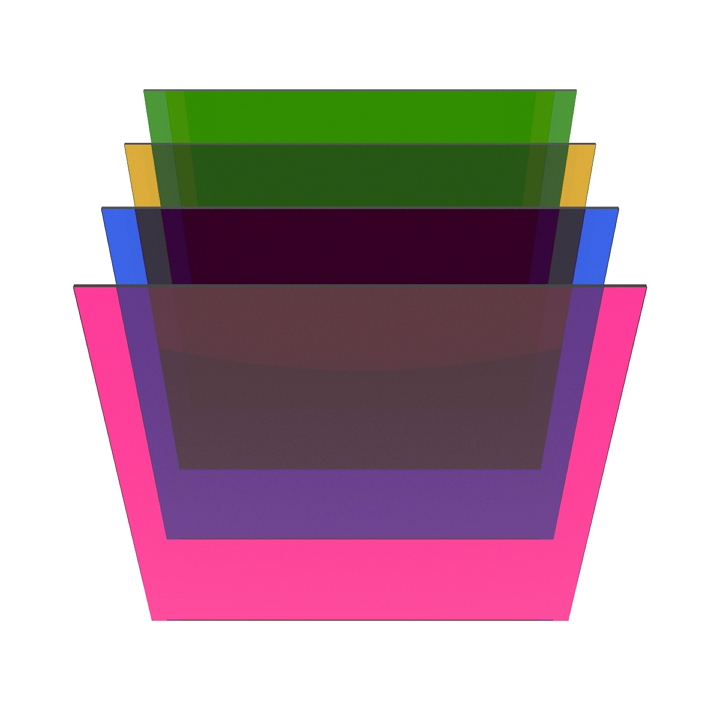
Max Refraction: 4 |
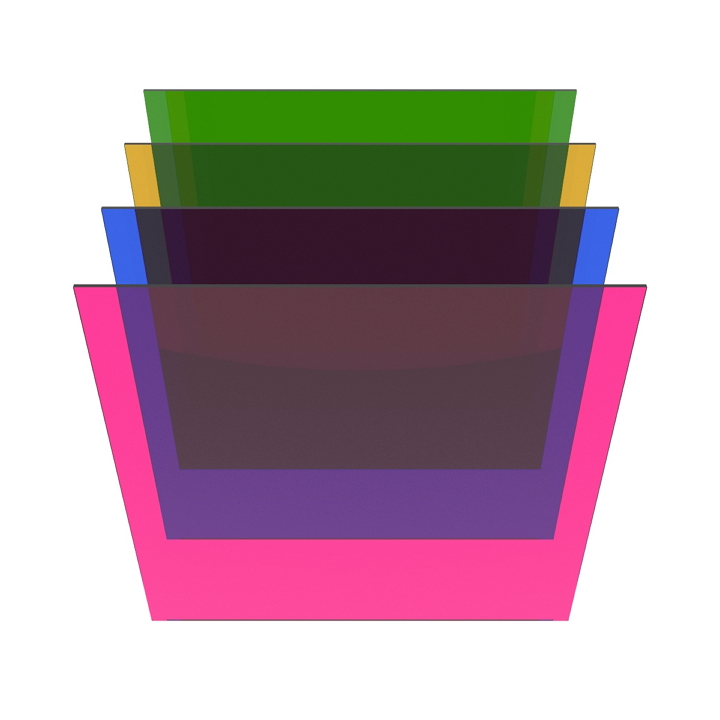
Max Refraction: 8 |
Max Glossy Refraction
The Max Glossy Refraction parameter is similar to the Max Refraction parameter. The difference is that it is aimed at working with matte refractive materials, such as semi-frosted glass.
Max Shadow
The Max Shadow parameter controls the accuracy of shadows cast by transparent objects. It defines the maximum number of surfaces that a light ray can encounter on its way causing these surfaces to cast shadows. Greater Max Shadow values produce softer and more accurate shadows but increase the rendering time.
Note
When passing through a voluminous object, a light ray encounters two boundaries: once upon entering the material, and once upon exiting it. Consider this when choosing the right Max Shadow value.
In the following example, there are three transparent layers between the light source and the ground plane that catches shadows. Notice how the accuracy of the shadows is changed as the Max Shadow value increases.
Max Shadow: 1 |
Max Shadow: 2 |
Max Shadow: 3 |
Final Render Advanced Settings
Advanced settings are aimed at improving the render result by removing artifacts that might appear in certain cases, and at optimizing the render performance.
Ray Epsilon
The Ray Epsilon parameter determines an offset used to move light rays away from the geometry for ray-surface intersection calculations. The reflected ray starts at a certain distance from the surface rather than at the bounce-off point. This helps to avoid self-shadowing and lighting artifacts that are common for ray tracers and caused by roundoff errors.
The ray epsilon distance is measured in millimeters. The default value is 0.02 mm, which is quite accurate for mid-scale scenes. However, for larger scenes involving distant objects or small-scale scenes, this value might need to be adjusted.
Tuning the ray cast epsilon parameter can also be useful for scenes where two or more materials are in contact, or where there is little to no space between meshes. The example below shows how changing the ray cast epsilon value affects the render result.
Ray epsilon: 0.02 |
Ray epsilon: 0.2 |
Clamp Irradiance
The Clamp Irradiance parameter limits the intensity, or the maximum brightness, of samples in the scene. Greater irradiance values produce more brightness.
Clamping is an effective method to prevent fireflies (hotpixels) without increasing the render time. Note that enabling clamping makes the lighting and reflections in the scene dimmer, and also affects the intensity of caustics. To find the desired balance between noise reduction and the overall scene appearance, it is recommended to start with a high clamp radiance value and decrease it step by step to a level where fireflies are no longer present.
Clamp Irradiance: 1 |
Clamp Irradiance: 10 |
Clamp Irradiance: 25 |
Out-of-Core Textures
The Out of Core Textures option allows you to overcome GPU VRAM hardware limitations when rendering high-resolution textures.
With the Out of Core Textures option enabled, AMD Radeon ProRender does not load the whole texture into VRAM. Instead, it allocates a certain amount of VRAM specified by the user. The texture is stored in the system memory (RAM) and is loaded to the VRAM on demand, as the render process goes. This approach allows you to render texture files larger than VRAM (such as a 32 GB texture on a GPU with 16 GB VRAM). Note that since the texture data needs to be sent to the graphic memory, having this option enabled might affect the rendering speed.
To enable use of out-of-core textures, select the Enable Out of Core Textures option and limit the amount of GPU memory that can be allocated to store texture data.
Note
If you use multiple GPUs, with different amounts of VRAM, the amount of allocated VRAM must be smaller than the smallest GPU VRAM.
Texture Compression
The Texture Compression option is used to compress textures to reduce the amount of memory required for storing texture data. It is recommended to have this option enabled, as it helps to save memory during the render process with practically no visible impact on the render quality.
Viewport Render Quality
In the Viewport Render Quality section, you can choose the necessary full spectrum rendering (FSR) mode for the viewport.
Viewport Ray Depths
By default, AMD Radeon ProRender uses the same Max Ray Depth, Max Diffuse Ray Depth and Max Reflection Ray Depth values for the viewport and final renders.
If necessary, for viewport render you can set custom (usually lower-quality) values.