Denoiser
Rendering complex scenes often takes prohibitively long to resolve noise. A typical decision for reducing the amount of noise would be to increase the number of samples and tune the quality settings. However, depending on the scene complexity and effects used, this might take far longer for the image to converge. An alternative solution for cleaning up the noise is to use the denoiser.
The denoiser ships with a set of filters that work by detecting noisy pixels and reconstructing their color. All filters come with tried and tested presets being a good point to start from.
You can choose between the following denoising filters:
Note
Although the denoiser allows you to keep sampling and render time low, do not consider it a magic wand. The decision whether to use the denoiser or not, and which filter to choose, will most likely depend on the project. Note also that the denoiser will perform better with more samples.
Requirements
Depending on the filter used, the denoiser can run on GPU or CPU. The Bilateral, Local Weighted Regression and Edge Avoiding filters run on GPU only. The Machine Learning filter also requires GPU but can use the CPU mode if no GPU is available.
Enabling Denoiser
In AMD Radeon ProRender, denoising is part of the rendering process, and should be enabled before you start rendering.
To enable the denoiser:
Open the Render Settings window and make sure that AMD Radeon ProRender is set as the active render engine in Maya.
For details, see Switching to Radeon ProRender for Maya.
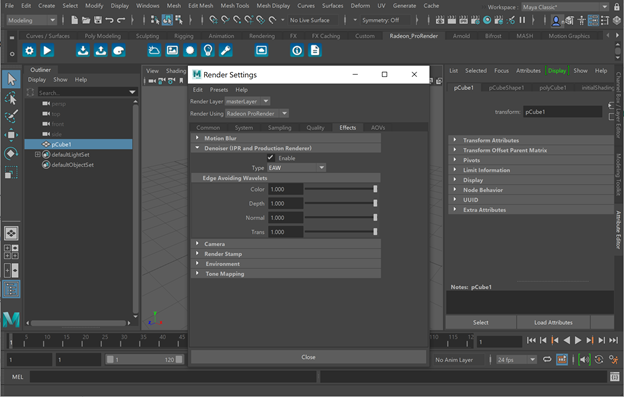
In the Render Settings window, switch to the Effects tab.
Expand the Denoiser section and select the Enable check box.
Choose the filter type.
Generally, it is recommended to use the default filter presets. However, you can tweak individual filter settings if you feel you can achieve better results.
Start the render.
The denoiser works for the IPR and the production render.