Motion Blur
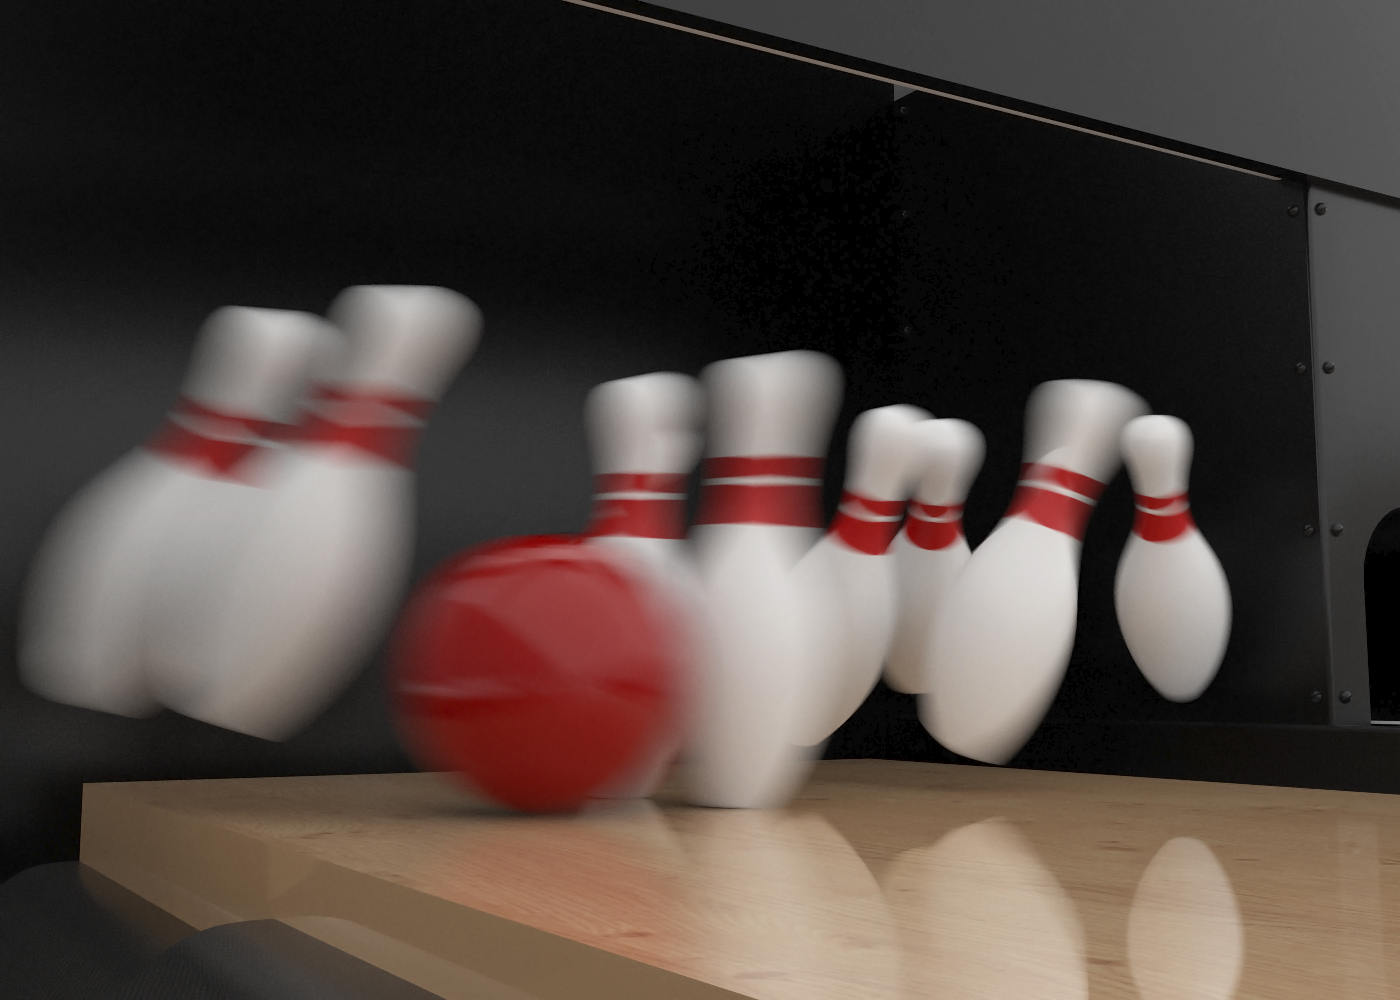
In photography, motion blur is an effect caused by objects moving during the camera exposure time. A high objects’ or camera speed, or long exposure time leads to a “smearing” effect of the object in the image.
AMD Radeon ProRender allows you to simulate the motion blur effect in animations. By default, an animated scene is rendered as a sequence of still images that do not convey the sense of speed for rapidly moving objects. In animation renders, this can appear jumpy since objects move between frames. With motion blur, objects appear smeared in the direction of motion, adding to a more realistic appearance, especially when playing an animation.
Motion blur applies to objects transformation (move), and is not supported for deformation animations, camera animations and particle animations.
In AMD Radeon ProRender, motion blur can be enabled on a per-scene, per-camera or per-object basis. When enabled at the scene level, motion blur applies to all objects in the scene. You can also enable motion blur for a moving camera, or per-object. The latter option might be useful if some objects in the scene only move slightly or stay still, giving no sense of motion, while others are moving fast.
Enabling Motion Blur
To enable the motion blur for production render:
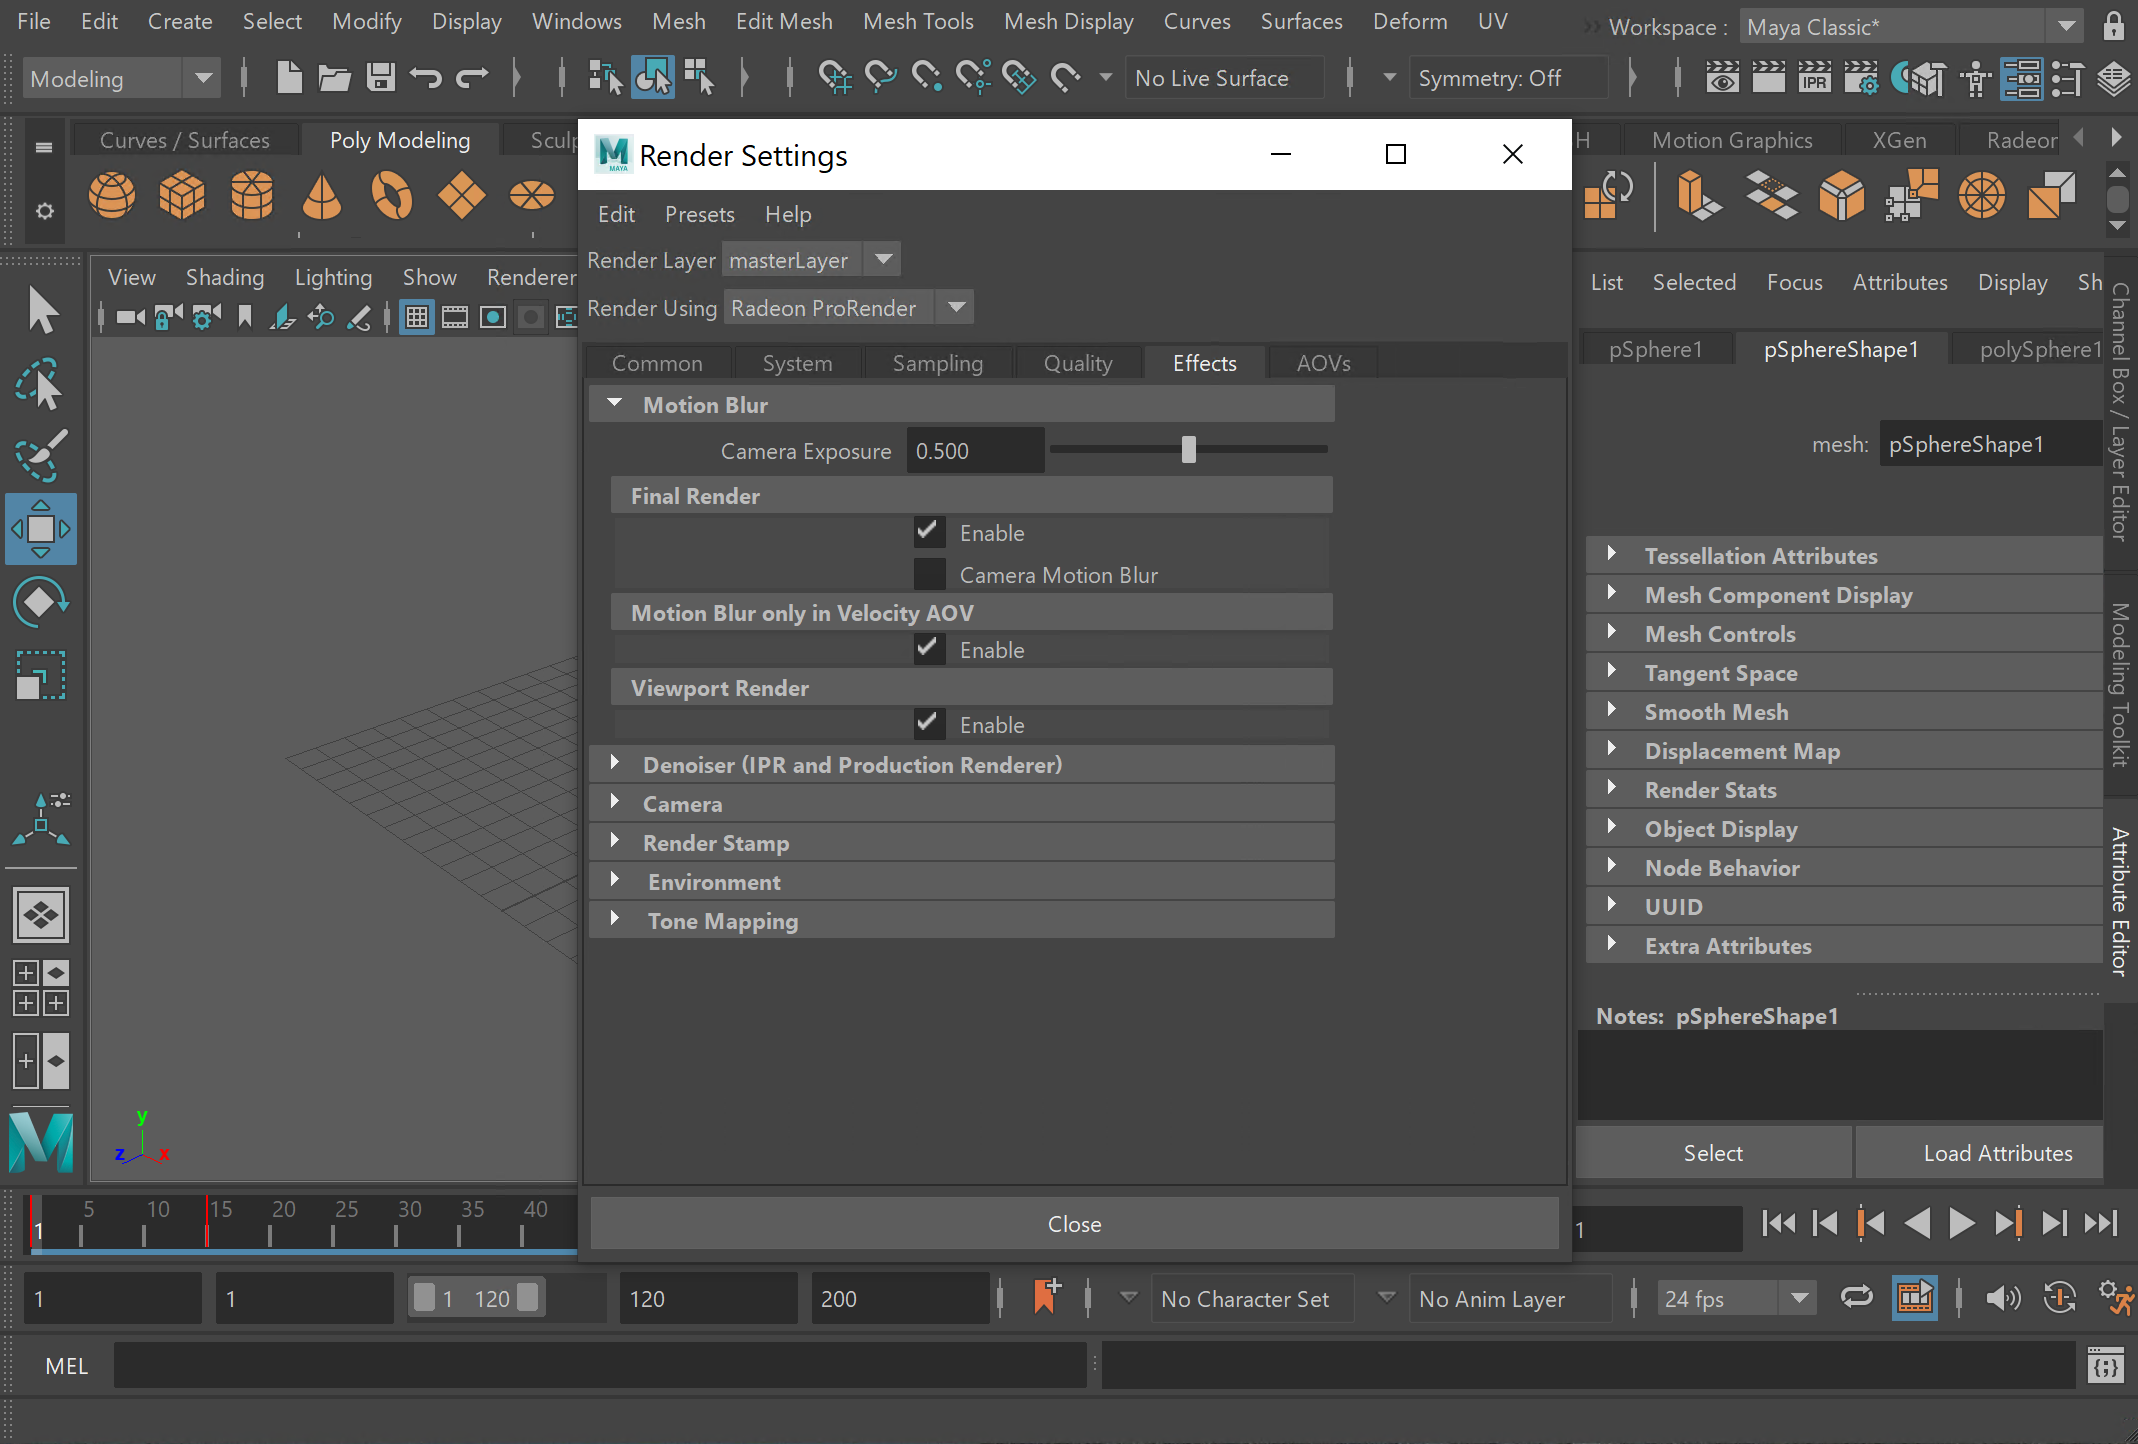
Open the Render Settings window and make sure that AMD Radeon ProRender is set as the active render engine in Maya.
For details, see Switching to Radeon ProRender for Maya.
In the Render Settings window, switch to the Effects tab.
Expand the Motion Blur section.
Set the Camera Exposure value to describe the intensity of motion blur.
To configure motion blur setting for the final render:
In the Final Render section, select the Enable check box.
To enable motion blur for a moving camera, select the Camera motion blur option.
To keep information about motion blur in the Velocity render pass, select the Motion blur only in Velocity AOV option.
Enabling this option keeps motion details encoded in the Velocity pass. At the same time, motion blur is removed from other passes, such as the Color pass, which can significantly increase the render speed.
To enable motion blur for the viewport, in the Viewport Render section, select the Enable check box.
When enabled, motion blur is applied to all objects in the scene. You can disable motion blur for specific objects using Maya Render Stats object settings.
Camera Exposure
The Camera Exposure parameter controls the length of the motion blur trail. It corresponds to the virtual camera’s shutter being open for some fraction of the frame time.
The value range is 0 to 1, assuming that 0 is equivalent to no frame length, 0.5 is equivalent to half frame length, and 1 is equivalent to full frame length.
Greater values accentuate motion blur and produce longer blur trails simulating greater speed, while smaller values increase the sharpness of the image and make the effect less apparent. Setting the Camera Exposure value to 0 produces no blur at all and can be used to freeze an instant in time with no trace of motion.

Camera exposure: 0, no blur |

Camera exposure: 0.5 |
Camera exposure: 1 |
Notes
Consider a few notes regarding motion blur:
Greater camera exposure values produce more blur but result in more noise. You might need to increase the number of samples to reduce the amount of noise in the blurred regions.